
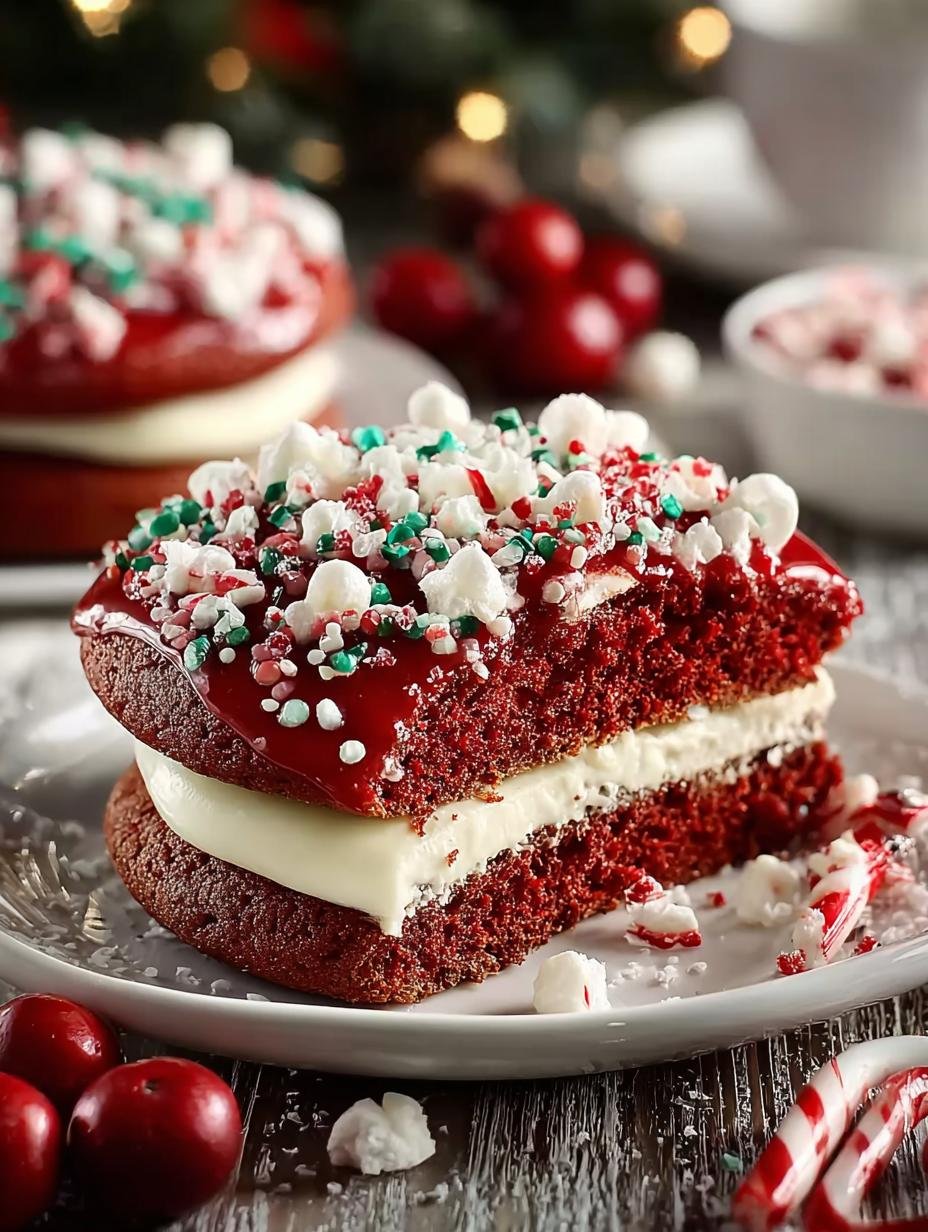
Santa’s Red Velvet Christmas Cookies are a festive, soft, and chewy treat, perfect for the holiday season. Topped with cream cheese frosting, they offer the ideal balance of sweet and tangy with a pop of red, making them a standout at any holiday gathering. These cookies are not just delicious; they’re also a delightful way to celebrate the season and bring joy to any Christmas party.
Why You’ll Love This Santa’s Red Velvet Christmas
There are numerous reasons to adore these cookies. First, they bring a vibrant pop of color to your holiday spread, embodying the spirit of Christmas. Second, the soft and chewy texture is incredibly satisfying, making them hard to resist. Third, the cream cheese frosting adds a rich and tangy flavor that perfectly complements the sweet cookie base. Fourth, they are easy to make, requiring just simple ingredients and minimal effort. Fifth, these cookies are perfect for sharing, making them ideal for Christmas gatherings and cookie exchanges. Finally, they can be decorated in fun ways, allowing you to create your own unique Santa-themed Red Velvet Dessert.
Ingredients for Santa’s Red Velvet Christmas
Gather these items:
- 2 ½ cups all-purpose flour
- 1 tablespoon cocoa powder
- 1 ½ teaspoons baking powder
- ½ teaspoon baking soda
- ¼ teaspoon salt
- 1 cup granulated sugar
- ½ cup unsalted butter, softened
- 1 large egg
- 1 teaspoon vanilla extract
- ½ cup buttermilk
- 1 tablespoon red food coloring (or more for vibrant color)
- 8 ounces cream cheese, softened
- 4 tablespoons unsalted butter, softened
- 2 cups powdered sugar
- 1 teaspoon vanilla extract
- A pinch of salt
How to Make Santa’s Red Velvet Christmas Step-by-Step
- Step 1: Preheat your oven to 350°F (175°C). Line two baking sheets with parchment paper or silicone baking mats.
- Step 2: In a large bowl, whisk together flour, cocoa powder, baking powder, baking soda, and salt. Set aside.
- Step 3: In a separate bowl, beat butter and sugar together until light and fluffy (about 2-3 minutes with an electric mixer).
- Step 4: Add the egg, vanilla extract, and buttermilk to the butter mixture. Beat until combined, then add red food coloring and mix until even.
- Step 5: Gradually add the dry ingredients into the wet mixture, mixing just until combined. Be careful not to overmix.
- Step 6: Use a cookie scoop or tablespoon to portion the dough onto prepared baking sheets, spacing them about 2 inches apart.
- Step 7: Bake for 10-12 minutes or until the edges are set, and the centers are soft. Remove from the oven and cool for 5 minutes on the baking sheets before transferring them to a cooling rack.
- Step 8: Beat together the softened cream cheese and butter until smooth. Add powdered sugar, vanilla extract, and a pinch of salt, and beat until creamy and fluffy.
- Step 9: Once the cookies have cooled completely, spread a generous amount of cream cheese frosting on each cookie.
Pro Tips for the Best Santa’s Red Velvet Christmas
Keep these in mind:
- Use room temperature ingredients for a smoother batter.
- Do not overmix; it can result in tough cookies.
- For vibrant color, feel free to add more food coloring.
- Let the cookies cool completely before frosting to prevent melting.
Best Ways to Serve Santa’s Red Velvet Christmas
These cookies shine at holiday gatherings! Serve them as part of a Christmas dessert platter alongside Santa’s Red Velvet Cake. Another idea is to package them in festive boxes for gifts or use them as part of a Christmas-themed Red Velvet dessert bar at your holiday party.
How to Store and Reheat Santa’s Red Velvet Christmas
Once baked, store your cookies in an airtight container at room temperature for up to one week. These cookies can also be frozen for up to three months. To reheat, simply pop them in the microwave for about 10 seconds to enjoy that fresh-baked taste again.
Frequently Asked Questions About Santa’s Red Velvet Christmas
What’s the secret to perfect Santa’s Red Velvet Christmas?
The secret lies in the balance of ingredients, particularly the buttermilk and red food coloring. They contribute to the cookie’s moist texture and vibrant color. Using fresh ingredients and not overmixing is key to achieving that perfect soft, chewy consistency.
Can I make Santa’s Red Velvet Christmas ahead of time?
Absolutely! You can prepare the dough in advance and refrigerate it for up to 3 days. Alternatively, you can bake the cookies ahead of time and store them in an airtight container. Just frost them on the day you plan to serve for the freshest taste.
How do I avoid common mistakes with Santa’s Red Velvet Christmas?
To avoid mistakes, ensure your ingredients are measured accurately and always use fresh baking powder and baking soda. Also, be cautious not to overbake; the cookies should look slightly underbaked when you take them out, as they will continue to cook on the baking sheet.
Variations of Santa’s Red Velvet Christmas You Can Try
Consider adding white chocolate chips for a delightful twist, or mix in crushed peppermint candy for a festive flavor. For a unique touch, try incorporating nuts or a different flavor of extract, such as almond. These variations can make your holiday dessert table even more exciting!
PrintSanta’s Red Velvet Christmas Cookies: A Festive Delight

Santa’s Red Velvet Christmas Cookies are a festive, soft, and chewy treat, perfect for the holiday season. Topped with cream cheese frosting, they offer the ideal balance of sweet and tangy with a pop of red.
- Prep Time: 30 minutes
- Cook Time: 15 minutes
- Total Time: 1 hour
- Yield: 24 cookies 1x
- Category: Dessert
- Method: Baking
- Cuisine: American
- Diet: Vegetarian
Ingredients
- 2 ½ cups all-purpose flour
- 1 tablespoon cocoa powder
- 1 ½ teaspoons baking powder
- ½ teaspoon baking soda
- ¼ teaspoon salt
- 1 cup granulated sugar
- ½ cup unsalted butter, softened
- 1 large egg
- 1 teaspoon vanilla extract
- ½ cup buttermilk
- 1 tablespoon red food coloring (or more for vibrant color)
- 8 ounces cream cheese, softened
- 4 tablespoons unsalted butter, softened
- 2 cups powdered sugar
- 1 teaspoon vanilla extract
- A pinch of salt
Instructions
- Preheat your oven to 350°F (175°C). Line two baking sheets with parchment paper or silicone baking mats.
- In a large bowl, whisk together flour, cocoa powder, baking powder, baking soda, and salt. Set aside.
- In a separate bowl, beat butter and sugar together until light and fluffy (about 2-3 minutes with an electric mixer).
- Add the egg, vanilla extract, and buttermilk to the butter mixture. Beat until combined, then add red food coloring and mix until even.
- Gradually add the dry ingredients into the wet mixture, mixing just until combined. Be careful not to overmix.
- Use a cookie scoop or tablespoon to portion the dough onto prepared baking sheets, spacing them about 2 inches apart.
- Bake for 10-12 minutes or until the edges are set, and the centers are soft. Remove from the oven and cool for 5 minutes on the baking sheets before transferring them to a cooling rack.
- Beat together the softened cream cheese and butter until smooth. Add powdered sugar, vanilla extract, and a pinch of salt, and beat until creamy and fluffy.
- Once the cookies have cooled completely, spread a generous amount of cream cheese frosting on each cookie.
Notes
Nutrition
- Serving Size: 1 cookie
- Calories: 150
- Sugar: 10g
- Sodium: 100mg
- Fat: 7g
- Saturated Fat: 4g
- Unsaturated Fat: 2g
- Trans Fat: 0g
- Carbohydrates: 20g
- Fiber: 0g
- Protein: 2g
- Cholesterol: 20mg








Leave a Reply