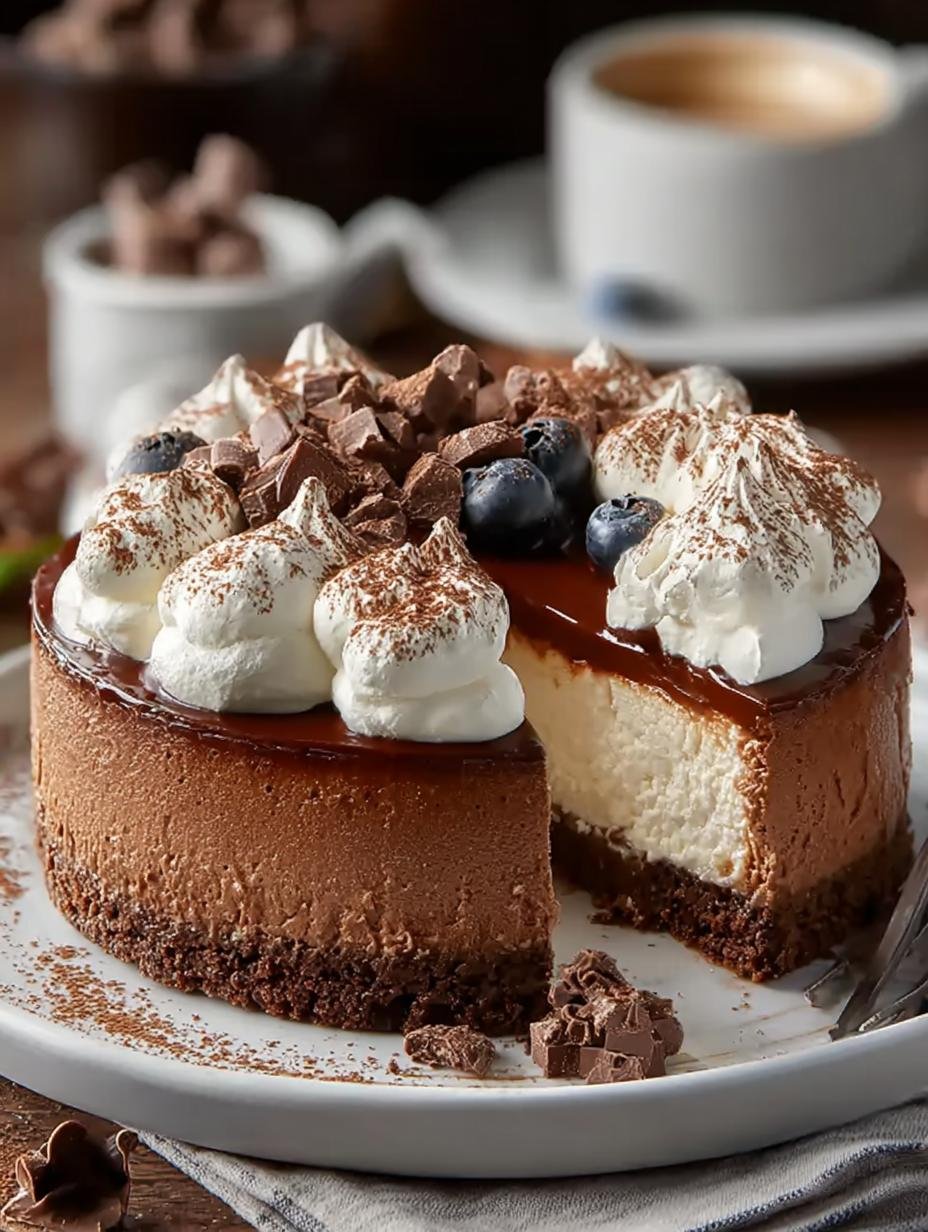
Hot Cocoa Cheesecake with Marshmallow Whipped Cream combines the comforting flavors of hot cocoa with the richness of cheesecake. This dessert features a creamy, chocolatey cheesecake base and a fluffy, sweet marshmallow whipped cream topping that creates a delightful experience. Perfect for winter gatherings or cozy nights at home, this dessert will impress your guests and warm your heart.
Why You’ll Love This Hot Cocoa Cheesecake with
This delightful dessert offers numerous reasons to fall in love with it. Firstly, its rich and creamy texture makes it a standout among other desserts. Secondly, the addition of marshmallow whipped cream gives it a playful twist that appeals to both kids and adults. Furthermore, it’s a versatile dessert that can be enjoyed year-round but shines particularly during winter parties. With its chocolatey flavor and decadent appeal, you can also play around with variations like no-bake Hot Cocoa Cheesecake or Hot Cocoa Cheesecake with Whipped Cream. Plus, it serves 12, making it perfect for gatherings!
Ingredients for Hot Cocoa Cheesecake with
Gather these items:
- 1 1/2 cups graham cracker crumbs
- 1/4 cup granulated sugar
- 1/2 cup unsalted butter, melted
- 3 (8 oz) packages cream cheese, softened
- 3/4 cup granulated sugar
- 1 teaspoon vanilla extract
- 1/4 cup unsweetened cocoa powder
- 1 cup sour cream
- 3 large eggs
- 1/2 cup heavy cream
- 1 cup heavy cream
- 1/4 cup marshmallow fluff (or marshmallow creme)
- 1 tablespoon powdered sugar
- 1/2 teaspoon vanilla extract
- Chocolate shavings or chocolate chips
- Mini marshmallows
- Cocoa powder, for dusting
How to Make Hot Cocoa Cheesecake with Step-by-Step
- Step 1: Preheat your oven to 325°F (163°C).
- Step 2: In a medium bowl, combine the graham cracker crumbs, sugar, and melted butter. Stir until the mixture resembles wet sand. Press the crust mixture into the bottom of a 9-inch springform pan.
- Step 3: Bake the crust in the preheated oven for 8-10 minutes, or until lightly golden. Remove from the oven and set aside to cool.
- Step 4: In a large mixing bowl, beat the cream cheese and sugar together using an electric mixer until smooth and creamy, about 2-3 minutes.
- Step 5: Add the vanilla extract and cocoa powder, and mix until combined.
- Step 6: Add the sour cream, and beat until smooth.
- Step 7: Add the eggs, one at a time, mixing on low speed after each addition. Scrape down the sides of the bowl as needed.
- Step 8: Finally, add the heavy cream and beat until the mixture is smooth and fluffy.
- Step 9: Pour the cheesecake filling over the cooled crust in the springform pan. Tap the pan on the counter to remove any air bubbles.
- Step 10: Bake the cheesecake in the preheated oven for 55-65 minutes, or until the center is set and only slightly jiggles when you tap the pan.
- Step 11: Turn off the oven, crack the oven door slightly, and let the cheesecake cool for about 1 hour. After the hour, remove the cheesecake from the oven and refrigerate for at least 4 hours, or preferably overnight, to fully set.
- Step 12: In a medium mixing bowl, beat the heavy cream, marshmallow fluff, and powdered sugar together until stiff peaks form, about 3-4 minutes.
- Step 13: Add the vanilla extract and mix until incorporated. The whipped cream should be thick and spreadable.
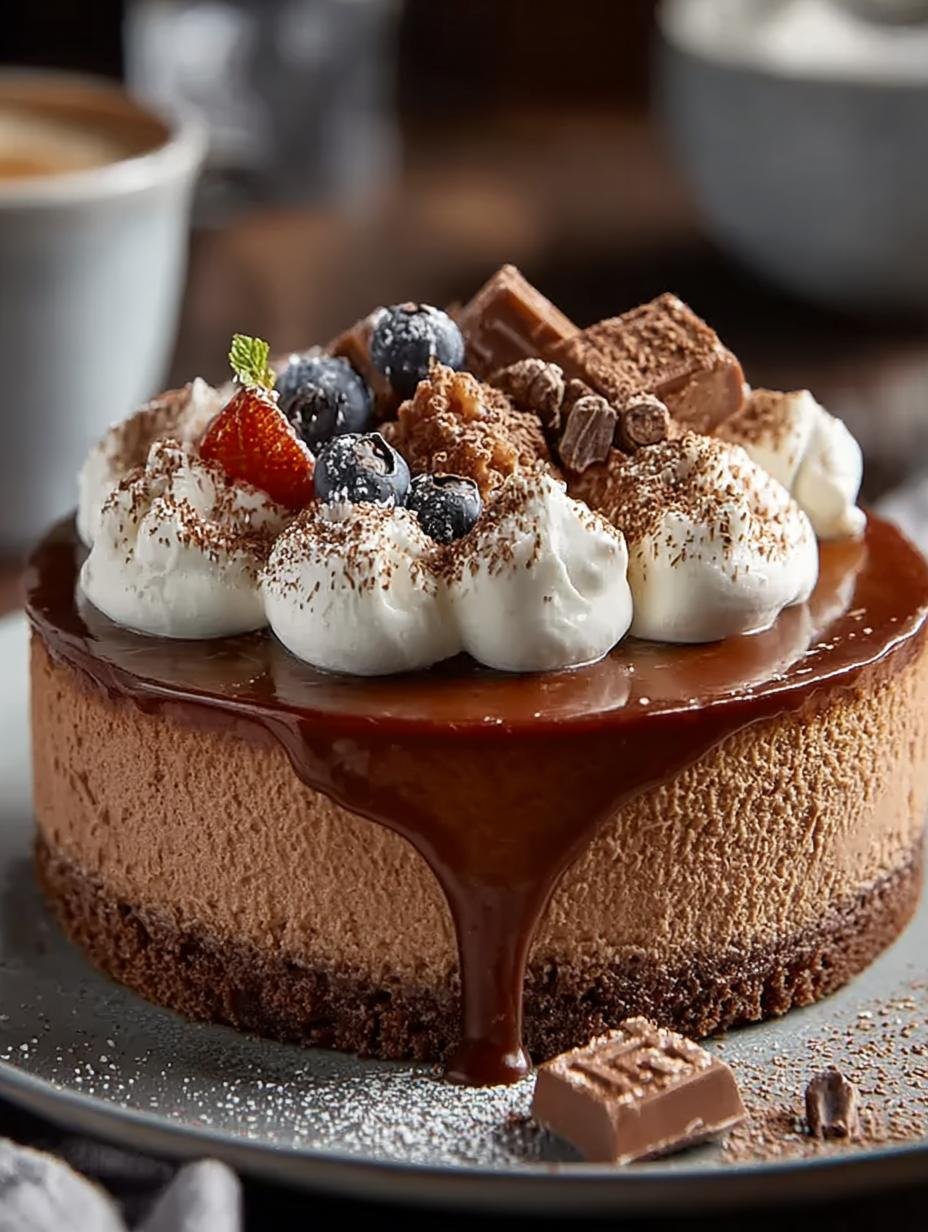
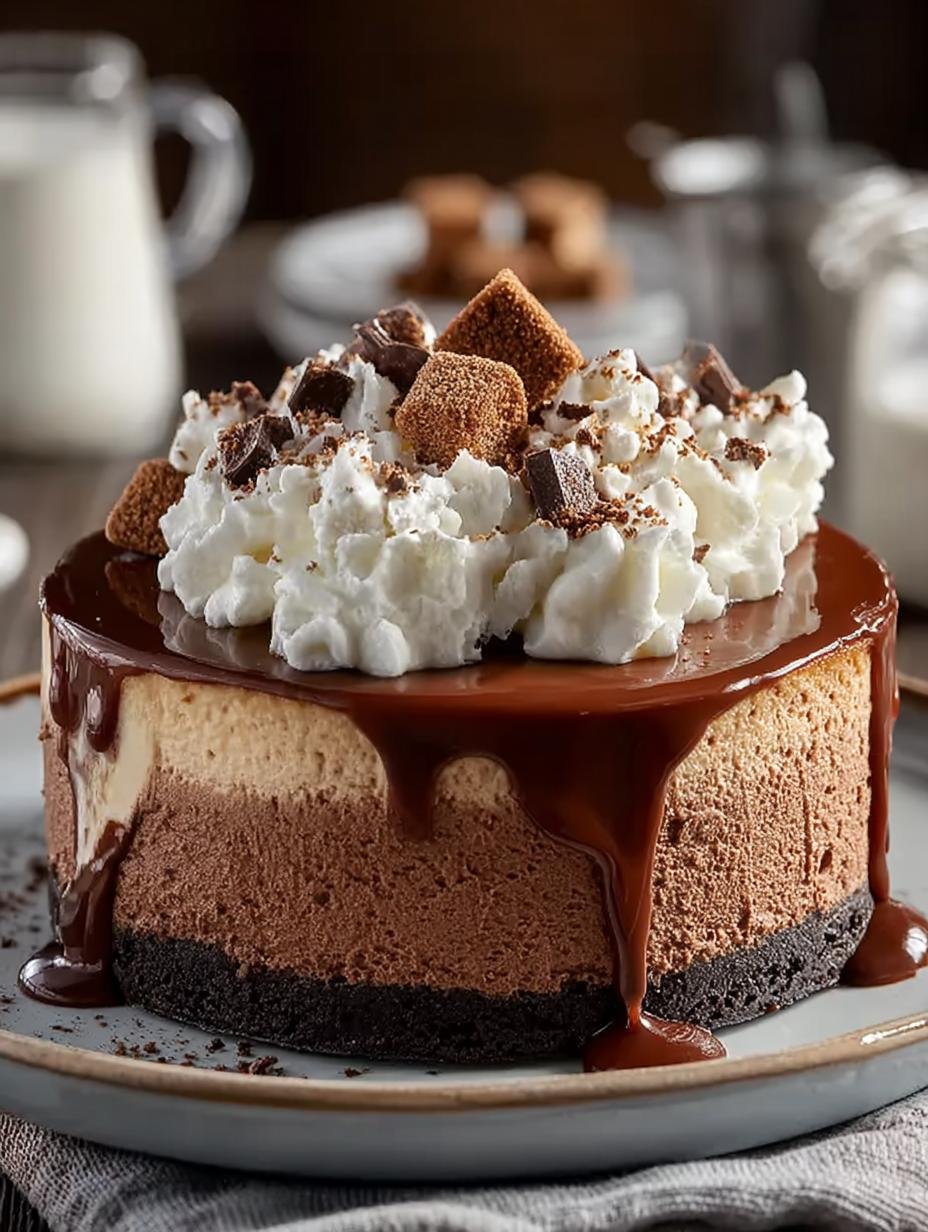
- Step 14: Once the cheesecake has fully chilled, remove it from the springform pan and spread a thick layer of marshmallow whipped cream over the top.
- Step 15: Optionally, pipe the whipped cream into decorative rosettes along the edges.
- Step 16: Garnish the cheesecake with chocolate shavings, mini marshmallows, and a light dusting of cocoa powder.
- Step 17: Slice and serve chilled.
Pro Tips for the Best Hot Cocoa Cheesecake with
Keep these in mind:
- This cheesecake is best served chilled.
- You can make it a day ahead for best results.
- Store leftovers in the refrigerator.
- For a richer flavor, consider using a combination of dark and milk chocolate in the cheesecake base.
Best Ways to Serve Hot Cocoa Cheesecake with
Consider these serving ideas:
- Pair it with a warm cup of hot cocoa for a delightful dessert combo.
- Top with additional mini marshmallows or a drizzle of chocolate sauce for extra indulgence.
- Serve at winter parties as a stunning centerpiece dessert that will leave guests wanting more.
How to Store and Reheat Hot Cocoa Cheesecake with
To store, cover the cheesecake tightly with plastic wrap or foil. It can be kept in the refrigerator for up to a week. For meal prep, you can make it a day in advance, allowing the flavors to meld beautifully. When ready to serve, no reheating is necessary; enjoy it chilled.
Frequently Asked Questions About Hot Cocoa Cheesecake with
What is Hot Cocoa Cheesecake?
Hot Cocoa Cheesecake is a decadent dessert that combines the rich flavors of hot cocoa with the creamy texture of cheesecake. It often features chocolate and marshmallow flavors, making it a delightful winter treat.
Can I make Hot Cocoa Cheesecake with marshmallows ahead of time?
Yes! This cheesecake can be prepared a day in advance. Just be sure to store it in the refrigerator to keep it fresh and delicious until serving.
How do I avoid common mistakes with Hot Cocoa Cheesecake with?
To prevent cracks in your cheesecake, avoid overmixing and ensure it is not baked too long. Letting it cool gradually in the oven also helps maintain a smooth surface.
Variations of Hot Cocoa Cheesecake with You Can Try
There are many fun twists to explore:
- For a no-bake Hot Cocoa Cheesecake, use a gelatin or whipped cream base instead of baking.
- Add peppermint extract for a festive holiday Hot Cocoa Cheesecake flavor.
- Experiment with flavored whipped creams or ganaches to complement the chocolate and marshmallow theme.
For more tips and recipes, visit our About Me page. If you have any questions, feel free to contact us. Don’t forget to check our Privacy Policy for more information. You can also read our Disclaimer for important details. Lastly, learn more about our author for insights into our culinary journey.
For more information on the benefits of chocolate, check out this Healthline article. You can also explore the history of cheesecake in this Spruce Eats article.
PrintIndulge in Hot Cocoa Cheesecake with Marshmallow Cream

Hot Cocoa Cheesecake with Marshmallow Whipped Cream combines the comforting flavors of hot cocoa with the richness of cheesecake. It features a creamy, chocolatey cheesecake base and a fluffy, sweet marshmallow whipped cream topping.
- Prep Time: 30 minutes
- Cook Time: 1 hour
- Total Time: 6 hours
- Yield: 12 servings 1x
- Category: Dessert
- Method: Baking
- Cuisine: American
- Diet: Vegetarian
Ingredients
- 1 1/2 cups graham cracker crumbs
- 1/4 cup granulated sugar
- 1/2 cup unsalted butter, melted
- 3 (8 oz) packages cream cheese, softened
- 3/4 cup granulated sugar
- 1 teaspoon vanilla extract
- 1/4 cup unsweetened cocoa powder
- 1 cup sour cream
- 3 large eggs
- 1/2 cup heavy cream
- 1 cup heavy cream
- 1/4 cup marshmallow fluff (or marshmallow creme)
- 1 tablespoon powdered sugar
- 1/2 teaspoon vanilla extract
- Chocolate shavings or chocolate chips
- Mini marshmallows
- Cocoa powder, for dusting
Instructions
- Preheat your oven to 325°F (163°C).
- In a medium bowl, combine the graham cracker crumbs, sugar, and melted butter. Stir until the mixture resembles wet sand. Press the crust mixture into the bottom of a 9-inch springform pan.
- Bake the crust in the preheated oven for 8-10 minutes, or until lightly golden. Remove from the oven and set aside to cool.
- In a large mixing bowl, beat the cream cheese and sugar together using an electric mixer until smooth and creamy, about 2-3 minutes.
- Add the vanilla extract and cocoa powder, and mix until combined.
- Add the sour cream, and beat until smooth.
- Add the eggs, one at a time, mixing on low speed after each addition. Scrape down the sides of the bowl as needed.
- Finally, add the heavy cream and beat until the mixture is smooth and fluffy.
- Pour the cheesecake filling over the cooled crust in the springform pan. Tap the pan on the counter to remove any air bubbles.
- Bake the cheesecake in the preheated oven for 55-65 minutes, or until the center is set and only slightly jiggles when you tap the pan.
- Turn off the oven, crack the oven door slightly, and let the cheesecake cool for about 1 hour. After the hour, remove the cheesecake from the oven and refrigerate for at least 4 hours, or preferably overnight, to fully set.
- In a medium mixing bowl, beat the heavy cream, marshmallow fluff, and powdered sugar together until stiff peaks form, about 3-4 minutes.
- Add the vanilla extract and mix until incorporated. The whipped cream should be thick and spreadable.
- Once the cheesecake has fully chilled, remove it from the springform pan and spread a thick layer of marshmallow whipped cream over the top.
- Optionally, pipe the whipped cream into decorative rosettes along the edges.
- Garnish the cheesecake with chocolate shavings, mini marshmallows, and a light dusting of cocoa powder.
- Slice and serve chilled.
Notes
- This cheesecake is best served chilled.
- You can make it a day ahead for best results.
- Store leftovers in the refrigerator.
Nutrition
- Serving Size: 1 slice
- Calories: 380 calories
- Sugar: 30g
- Sodium: 300mg
- Fat: 25g
- Saturated Fat: 15g
- Unsaturated Fat: 8g
- Trans Fat: 0g
- Carbohydrates: 44g
- Fiber: 1g
- Protein: 5g
- Cholesterol: 100mg


Leave a Reply