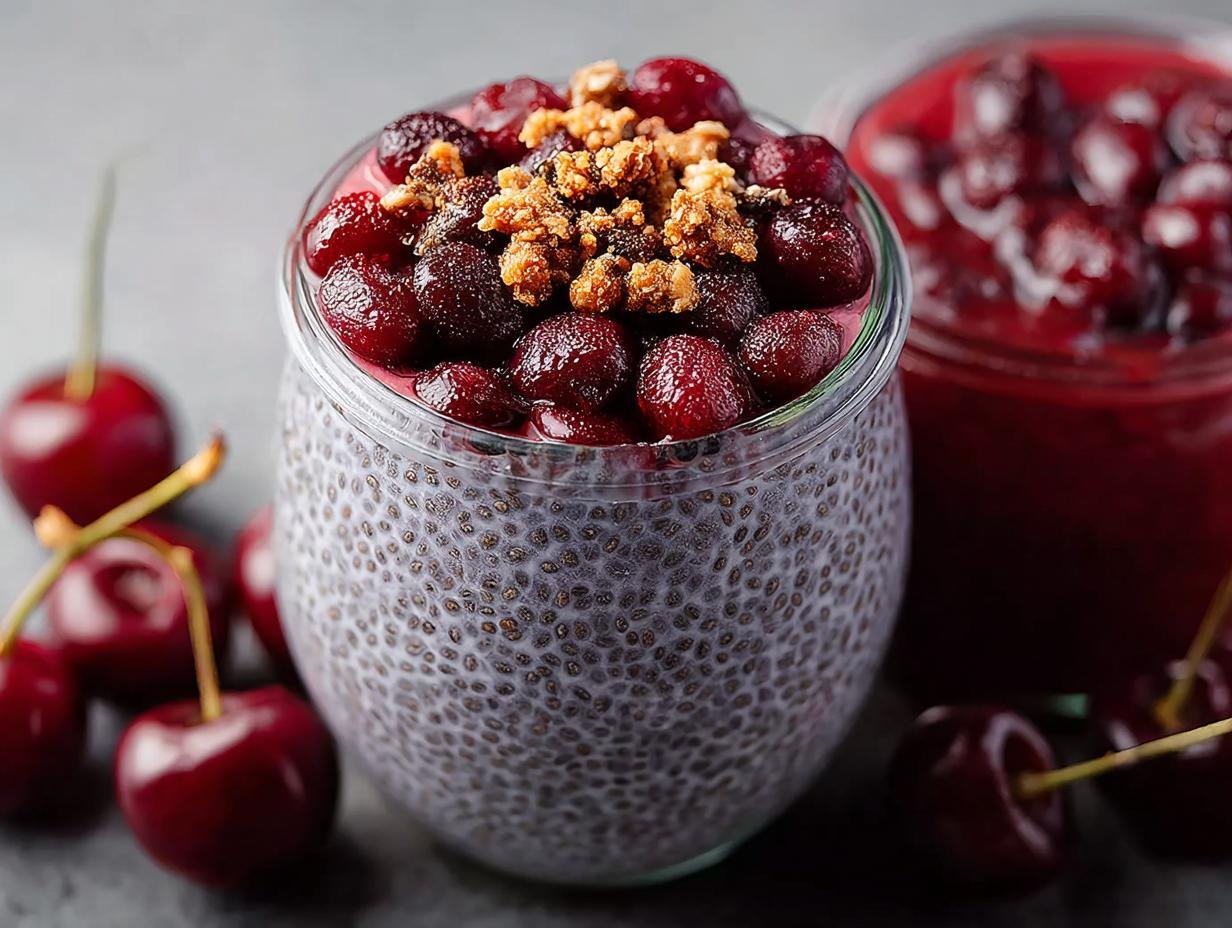
Cherry Chia Pudding has become my go-to for a quick, healthy breakfast that tastes like dessert. I remember the first time I tried a homemade version; it was a revelation – creamy, slightly tart from the cherries, and so satisfying. It felt like I was indulging, but I was actually fueling my body with goodness! This recipe, my simple cherry chia pudding, is incredibly easy to whip up, especially if you’re looking for a delicious vegan cherry chia pudding. The blend of sweet cherries and nutty almond extract is just divine. Let’s get cooking!
Why You’ll Love This Cherry Chia Pudding
This isn’t just any pudding; it’s a little jar of sunshine and goodness! You’ll absolutely adore this cherry chia seed pudding for so many reasons:
- It’s incredibly healthy, packed with fiber and omega-3s.
- It’s naturally vegan cherry chia pudding, making it a perfect plant-based treat.
- The sweetness from the cherries is just right, making it a delicious dessert or breakfast.
- It’s so easy to make, perfect for busy mornings.
- Prep is minimal, and the fridge does all the work for this overnight cherry chia pudding.
- It’s naturally gluten-free and dairy-free.
- The vibrant color is as appealing as the taste!
- It’s a truly nutritious cherry chia pudding that will keep you satisfied.
Ingredients for Cherry Chia Pudding
Gathering your ingredients is the first step to making this wonderful cherry chia seed pudding recipe. It’s full of wholesome goodness!
- 1/2 cup (70 g) frozen cherries – these provide a vibrant color and natural sweetness, plus they help chill the pudding quickly.
- 1/2 cup (125 ml) dairy-free milk – I love using almond milk for its subtle nutty flavor, but oat or coconut milk work beautifully too for a creamier texture.
- 2 teaspoons maple syrup – adjust this to your liking for sweetness. It’s a great vegan alternative to honey.
- 1/8 teaspoon almond extract – this little bit adds a wonderful depth of flavor that complements the cherries perfectly. You can swap it for vanilla if you prefer.
- 3 tablespoons (30 g) whole chia seeds – these tiny powerhouses are what thicken the pudding and are packed with fiber and omega-3s, making this a truly nutritious cherry chia pudding.
How to Make Cherry Chia Pudding
Making this delightful cherry chia seed pudding is as simple as blending and waiting! It’s a foolproof process that guarantees a delicious result every time. No oven preheating is needed for this chilled treat!
- Step 1: Blend the Base. Grab your blender and add the 1/2 cup (70 g) frozen cherries, 1/2 cup (125 ml) dairy-free milk, 2 teaspoons maple syrup, and 1/8 teaspoon almond extract. Blend everything on high speed until it’s completely smooth and creamy. You want a vibrant, luscious liquid that smells wonderfully fruity. Using a personal blender makes this step super quick and efficient for single servings of this easy cherry chia pudding.
- Step 2: Incorporate the Chia Seeds. Pour the smooth cherry mixture into a jar or your chosen container. Now, add the 3 tablespoons (30 g) whole chia seeds. Stir them in really well with a spoon or whisk, making sure there are no clumps. You want every single seed to be coated in the cherry liquid so they can work their magic.
- Step 3: The First Rest and Stir. Let the mixture sit on your counter for about 10 minutes. This initial rest is crucial. After 10 minutes, give it another good stir. You’ll notice it starting to thicken slightly. This second stir is key to preventing any clumping and ensuring an even texture throughout your overnight cherry chia pudding.
- Step 4: Overnight Chill for Perfect Pudding. Cover your container tightly with a lid or plastic wrap. Place it in the refrigerator and let it chill overnight, or for at least 4-6 hours. This extended chilling time is what allows the chia seeds to absorb all the liquid and swell, transforming the mixture into a thick, creamy pudding. The anticipation is part of the fun for this healthy cherry chia pudding!
- Step 5: Final Touches and Enjoy!. Once it’s time to eat, give your cherry chia pudding one last stir. Taste it and add a little more maple syrup if you like it sweeter. If it seems too thick for your liking, just stir in a tiny splash more dairy-free milk. Now, add your favorite toppings – perhaps some fresh cherries, a sprinkle of granola, or toasted coconut flakes – and dig in!
Pro Tips for the Best Cherry Chia Pudding
I’ve learned a few tricks to make this cherry chia seed pudding absolutely perfect every time. These tips ensure a wonderfully creamy texture and fantastic flavor, making it the best cherry chia pudding you’ll ever taste.
- Always use frozen cherries; they help chill the pudding faster and contribute to a thicker consistency without watering it down.
- Don’t skip the second stir after the initial 10 minutes! This is crucial for preventing clumps and ensuring an even texture throughout your pudding.
- For an extra creamy texture, consider using full-fat canned coconut milk or oat milk rather than lighter options.
- Taste and adjust sweetness *after* chilling, as flavors can mellow slightly in the cold.
What’s the secret to perfect Cherry Chia Pudding?
The real secret to a perfect cherry flavored chia pudding lies in the double stir. The initial rest allows the seeds to start absorbing, and the second stir breaks up any clumps, ensuring a smooth, consistently thick texture without any grainy bits.
Can I make Cherry Chia Pudding ahead of time?
Absolutely! This is an overnight cherry chia pudding, so making it ahead is the entire point. Prepare it the night before and store it covered in the refrigerator. It’s ready to grab and go for a quick breakfast or snack. You can learn more about the author’s journey with healthy recipes.
How do I avoid common mistakes with Cherry Chia Pudding?
The most common mistake is not stirring enough, leading to clumpy pudding. Another pitfall is not letting it chill long enough; chia seeds need time to absorb the liquid. If it’s too thick, just stir in a little more milk. For more information on the nutritional benefits of chia seeds, check out this resource.
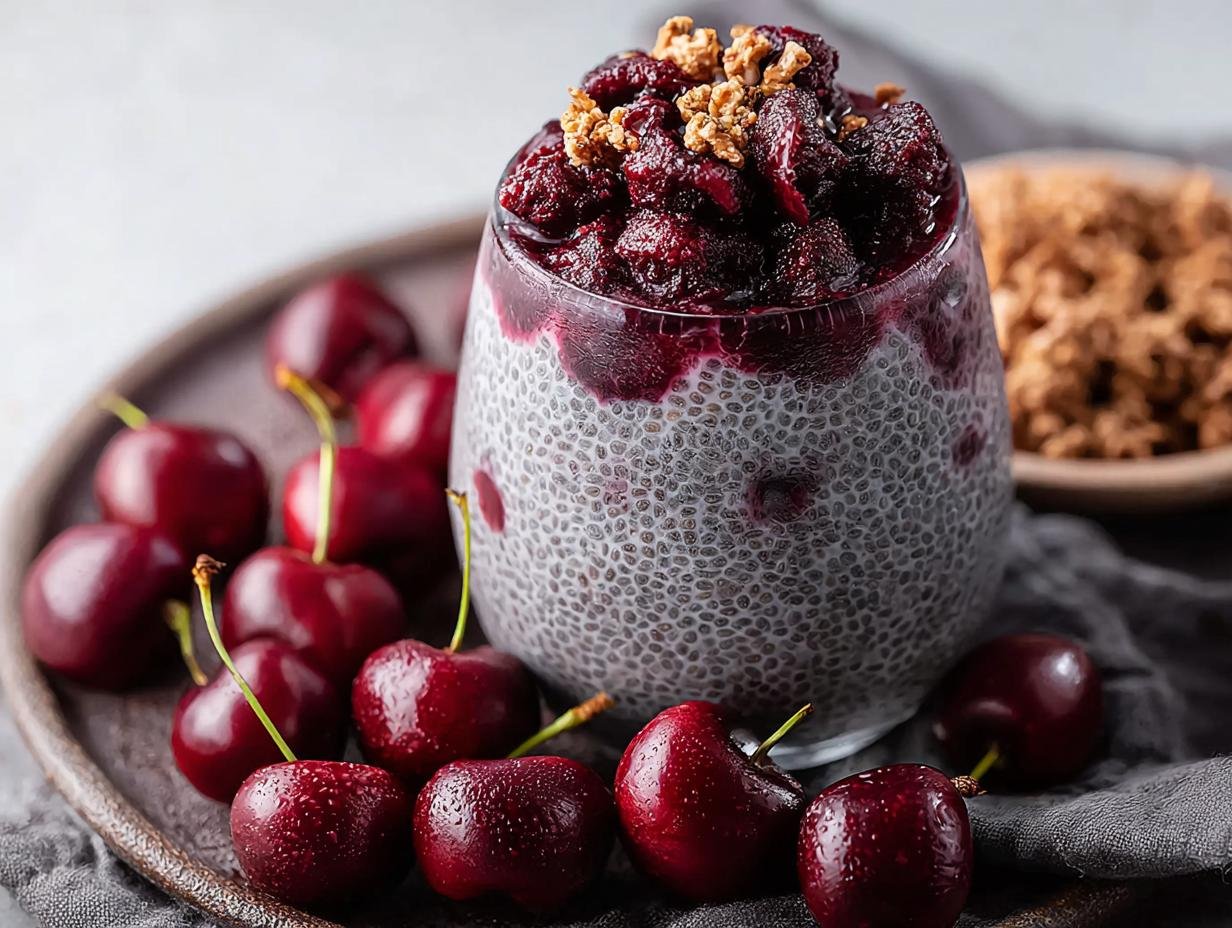
Best Ways to Serve Cherry Chia Pudding
This vibrant cherry chia pudding is a treat on its own, but it truly shines with a few thoughtful additions. For a delightful breakfast, try pairing it with a side of gluten-free granola for a satisfying crunch that contrasts beautifully with the creamy pudding. Another fantastic serving suggestion is to top your vegan cherry chia pudding with a dollop of dairy-free yogurt and a sprinkle of toasted nuts or seeds. If you’re serving it as a dessert, a few fresh cherries or a light dusting of shredded coconut can elevate it to something truly special. It’s also wonderful alongside a simple fruit salad for a light and refreshing meal. You can find more recipe ideas from our team.

Nutrition Facts for Cherry Chia Pudding
Here’s a look at the nutritional breakdown for one serving of this delicious cherry chia seed pudding. It’s a powerhouse of nutrients!
- Calories: 220 kcal
- Fat: 10 g
- Saturated Fat: 1 g
- Unsaturated Fat: 8 g
- Trans Fat: 0 g
- Protein: 6 g
- Carbohydrates: 26 g
- Fiber: 11 g
- Sugar: 10 g
- Sodium: 40 mg
- Cholesterol: 0 mg
Nutritional values are estimates and may vary based on specific ingredients used, particularly the type of dairy-free milk and sweetener. For more details on dietary guidelines, consult official dietary guidelines.
How to Store and Reheat Cherry Chia Pudding
This easy cherry chia pudding is fantastic for meal prep, and thankfully, it stores beautifully! Once it’s finished chilling and you’ve enjoyed your first serving, let any leftovers cool completely before storing. I like to use airtight containers, like small glass jars or reusable silicone containers, to keep it fresh. You can confidently store this dairy-free cherry chia pudding in the refrigerator for about 3 to 4 days. If you want to keep it even longer, freezing is a great option! Transfer it to freezer-safe containers, and it should last for up to 3 months. To reheat, simply thaw it overnight in the fridge. If it seems a bit too thick after chilling or thawing, just stir in a splash of your favorite dairy-free milk until it reaches your desired consistency. Enjoy your delicious, prepped pudding anytime!
Frequently Asked Questions About Cherry Chia Pudding
What is cherry chia pudding?
Cherry chia pudding is a simple, nutritious dish made by combining chia seeds with a liquid base, often blended cherries and dairy-free milk, then allowing it to thicken. It’s a popular choice for a healthy breakfast or snack because it’s packed with fiber, omega-3s, and antioxidants from the cherries.
Can I use fresh cherries instead of frozen for this cherry chia seed pudding recipe?
Yes, you absolutely can use fresh cherries! If you use fresh cherries, your pudding might not chill as quickly, so you may need to extend the refrigeration time a bit. If the fresh cherries aren’t very sweet, you might need to add a touch more maple syrup to achieve the desired sweetness in your cherry flavored chia pudding.
How do I make this recipe vegan cherry chia pudding if I don’t have dairy-free milk?
If you don’t have dairy-free milk on hand, water can be used in a pinch, but it will result in a less creamy pudding. For the best results in a vegan cherry chia pudding, I highly recommend using almond, oat, or coconut milk. These options provide a richer flavor and creamier texture that really enhances the overall experience. You can find more information on our privacy policy regarding ingredient recommendations.
Why is my cherry chia pudding not thickening?
If your healthy cherry chia pudding isn’t thickening, it could be due to a few reasons. Make sure you used the correct ratio of chia seeds to liquid – too much liquid can prevent thickening. Also, ensure you stirred thoroughly after the initial 10 minutes to break up any clumps and allow the seeds to absorb the liquid evenly. Sometimes, older chia seeds might not absorb liquid as effectively, so using fresh seeds is always a good idea.
Variations of Cherry Chia Pudding You Can Try
This cherry chia pudding is wonderfully versatile, and you can easily customize it to suit your tastes and dietary needs. Here are a few ideas to get you inspired for your next batch of cherry chia seed pudding:
- Berry Blast: Add a handful of mixed berries like raspberries or blueberries along with the cherries to the blender. This creates a beautiful swirl of flavors and colors.
- Tropical Twist: Swap half of the dairy-free milk for coconut milk and add a tablespoon of shredded coconut to the mixture before chilling for a delightful tropical vibe in your cherry flavored chia pudding.
- Chocolate Cherry Delight: Stir in a tablespoon of unsweetened cocoa powder with the chia seeds. This transforms your easy cherry chia pudding into a decadent, yet healthy, chocolatey treat.
- Spiced Cherry Pudding: Add a pinch of cinnamon or cardamom to the blender for a warm, comforting flavor profile, perfect for a cozy breakfast or dessert.
Delicious Cherry Chia Pudding: 1 Easy Recipe

This Cherry Chia Pudding is a refreshing, healthy, and easy-to-make vegan and gluten-free dessert or breakfast option. Made with frozen cherries, dairy-free milk, maple syrup, almond extract, and nutrient-dense chia seeds, it offers a naturally sweet and creamy texture packed with antioxidants, fiber, and omega-3s. Perfect for prepping the night before, this pudding provides a convenient and tasty way to start your day or enjoy a guilt-free treat.
- Prep Time: 5 minutes
- Cook Time: 0 minutes
- Total Time: 8 hours 15 minutes
- Yield: 1 serving 1x
- Category: Breakfast, Dessert, Snack
- Method: Blending and Refrigeration
- Cuisine: American
- Diet: Vegan
Ingredients
- 1/2 cup (70 g) frozen cherries
- 1/2 cup (125 ml) dairy-free milk (such as almond, oat, or coconut milk)
- 2 teaspoons maple syrup, or to taste
- 1/8 teaspoon almond extract, or to taste
- 3 tablespoons (30 g) whole chia seeds
Instructions
- Blend Ingredients: Add the frozen cherries, dairy-free milk, maple syrup, and almond extract into a blender. Blend until smooth to create a fruity and flavorful base. Using a small personal blender works best for making single servings efficiently.
- Add Chia Seeds: Pour the blended cherry milk mixture into a jar or container, then stir in the whole chia seeds thoroughly to ensure they are evenly distributed.
- Initial Rest: Let the mixture sit for about 10 minutes. After this resting period, stir again to break up any clumps and help the chia seeds begin absorbing the liquid.
- Refrigerate Overnight: Cover the container and refrigerate the pudding overnight. This time allows the chia seeds to fully hydrate and thicken the mixture, creating a pudding-like consistency. Some brands of chia seeds may thicken sooner, in which case a few hours might suffice.
- Final Stir and Serve: Before eating, give the pudding one last stir. Taste and add additional maple syrup if you prefer it sweeter. Top with your favorite toppings such as fresh fruit, nuts, or coconut flakes if desired, then enjoy.
Notes
- Use any preferred dairy-free milk, such as almond, oat, or coconut milk, to tailor the flavor and creaminess to your liking.
- Adjust maple syrup sweetness as desired; you can also substitute with agave nectar or honey if not strictly vegan.
- The almond extract adds a subtle nutty flavor but can be omitted or replaced with vanilla extract if preferred.
- If chia pudding is too thick in the morning, stir in a splash of milk to loosen the consistency.
- Store leftovers covered in the refrigerator for up to 3 days for best freshness.
- Adding toppings like sliced almonds, shredded coconut, or fresh cherries can enhance texture and flavor.
Nutrition
- Serving Size: 1 serving (about 250 g)
- Calories: 220 kcal
- Sugar: 10 g
- Sodium: 40 mg
- Fat: 10 g
- Saturated Fat: 1 g
- Unsaturated Fat: 8 g
- Trans Fat: 0 g
- Carbohydrates: 26 g
- Fiber: 11 g
- Protein: 6 g
- Cholesterol: 0 mg


Leave a Reply