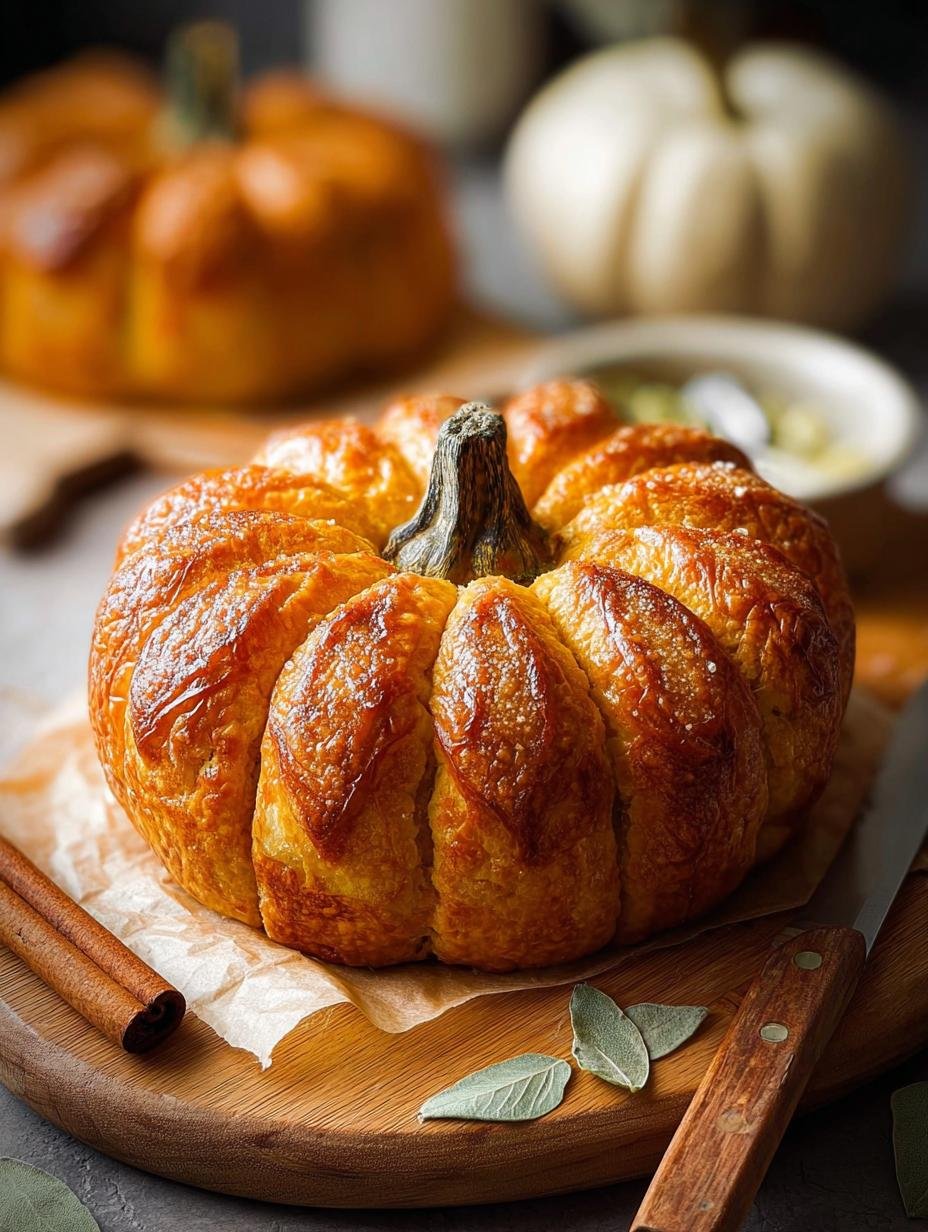
Pumpkin shaped bread has become a staple in my autumn kitchen ever since I first tried to recreate a beautiful loaf I saw at a fall festival. I remember the rich, yeasty aroma filling my home as it baked, and the joy on my family’s faces when they saw its charming form. Learning how to make pumpkin shaped bread transformed my holiday tables, offering a delightful centerpiece that tastes as incredible as it looks. This easy ground turkey dinner recipe is perfect for adding a touch of festive cheer to any meal. Let’s get cooking!
Why You’ll Love This Pumpkin Shaped Bread
I know you’re going to adore this pumpkin shaped bread for so many reasons. It’s more than just a pretty loaf; it brings warmth and joy to any table.
- It boasts a wonderfully soft texture and a subtly sweet flavor that everyone enjoys.
- The prep time is surprisingly quick, making it perfect for busy autumn days.
- It’s a fantastic budget-friendly option, using simple pantry staples.
- This bread is incredibly family-friendly, appealing to both kids and adults alike.
- It makes for a truly festive bread for Thanksgiving, elevating your holiday spread.
- You’ll love seeing your guests gasp in delight at its unique, charming shape.
- It’s an impressive centerpiece, making it an ideal festive bread for Thanksgiving gatherings.
- Plus, the aroma that fills your kitchen while it bakes is absolutely divine!
Ingredients for Pumpkin Shaped Bread
To create this delightful pumpkin shaped bread, you’ll need a few common ingredients that come together to form a soft, flavorful loaf. Crafting a beautiful homemade pumpkin bread recipe starts with selecting quality components, and I’ve found these work best for a consistently perfect result every time.
- 28 ounces bread flour (or all-purpose, about 5 1/2 cups, spooned and leveled) – I prefer bread flour for its higher protein content, which gives the bread a lovely chew.
- 10 grams instant yeast (about 3 teaspoons) – This little powerhouse ensures your bread rises beautifully.
- 2 ounces sugar (4 tablespoons) – Just enough to give a hint of sweetness and aid in browning.
- 16 ounces warm milk (110ºF) or water (2 cups) – Warm liquid is crucial for activating the yeast.
- 1 1/2 teaspoons salt – Essential for flavor and controlling yeast activity.
- 2 ounces olive oil or melted butter (1/4 cup) – Adds richness and helps keep the bread tender.
- Egg wash (1 egg beaten with a little water) or milk (for brushing) – For that gorgeous golden crust.
- Baker’s twine (four 20-inch pieces) – This is key for achieving the pumpkin shape.
- Cinnamon stick or candy apple stick (for pumpkin stem garnish, optional) – A charming finishing touch for your pumpkin shaped bread.
How to Make Pumpkin Shaped Bread
Creating this beautiful pumpkin shaped bread is a fun and rewarding process. I’ll walk you through each step, ensuring you get a perfectly shaped and delicious loaf. This detailed recipe for pumpkin shaped bread will help you bake with confidence.
- Step 1: First, warm your milk or water to between 110ºF and 115ºF. This is crucial for activating the yeast without killing it. I usually use a thermometer to be precise, as too hot or too cold can affect your rise.
- Step 2: In the bowl of a stand mixer fitted with the dough hook, combine the flour, instant yeast, sugar, and warm milk. Mix on low speed for one minute until the ingredients just start to come together and form a shaggy dough.
- Step 3: Now, add the salt and olive oil (or melted butter) to the mixer bowl. Continue mixing on low. If you notice the dough isn’t sticking to the bowl due to the butter, you might need to add 1/4 cup more flour. Conversely, if it’s too dry, add 1-2 tablespoons of water until it reaches a sticky but manageable consistency.
- Step 4: Increase the mixer speed to 2 and let it knead for 5 minutes. After this, perform the windowpane test: stretch a small piece of dough between your fingers. If it forms a thin, translucent membrane without tearing, your gluten is developed. If it tears, mix for 2 additional minutes. This ensures a beautifully elastic dough for your pumpkin shaped bread.
- Step 5: Turn the dough onto a lightly floured surface and give it 4–5 gentle turns to form a smooth ball. Lightly coat a large bowl with olive oil, then place the dough seam side down in the bowl. Flip it over so the top is also lightly oiled. Cover with a cloth and let it rise in a warm area for about 25 minutes, or until the dough has doubled in size.
- Step 6: While your dough is rising, preheat your oven to 375ºF (190ºC). This way, it’s ready to go when your dough is.
- Step 7: Once risen, divide the dough into two equal loaves. Pull the edges of each piece toward the center to shape them into smooth, round balls.
- Step 8: Cut four 20-inch pieces of baker’s twine and arrange them in a criss-cross pattern on a parchment-lined baking sheet. This is how we’ll get the distinctive pumpkin shape.
- Step 9: Position one shaped loaf directly on top of the twine arrangement on the baking sheet. Lightly brush the top of the dough with egg wash for a beautiful golden-brown finish; if you prefer, milk works too for a softer crust.
- Step 10: Loosely tie each string around the loaf to create pumpkin segments, remembering to allow room for the bread to rise and expand during baking. Trim off any excess twine.
- Step 11: Use a razor blade to make shallow, wheat-shaped slashes in each section of the pumpkin. This decorative touch not only looks fantastic but also helps prevent tearing during baking.
- Step 12: Bake for 25 to 30 minutes, or until the loaves are golden brown and an internal thermometer reads between 190º–200ºF (88º–93ºC). The aroma will be incredible!
- Step 13: After baking, carefully remove the twine. For an extra festive touch, insert a cinnamon stick or candy apple stick in the center as a pumpkin stem garnish. This completes your beautiful pumpkin shaped bread!
Pro Tips for the Best Pumpkin Shaped Bread
I’ve learned a few tricks over the years that will guarantee your pumpkin shaped bread turns out perfectly every time. These expert tips will help you achieve that gorgeous shape and delicious texture you’re aiming for.
- Always ensure your baker’s twine is loosely tied around the dough. If it’s too tight, the bread won’t be able to expand properly, resulting in a misshapen loaf instead of a beautiful pumpkin.
- Don’t skip the egg wash! It’s not just for shine; it helps create that lovely golden-brown crust and enhances the overall visual appeal of your festive bread.
- Allow the dough to double in size during the first rise. Patience here is key for a light and airy texture. A warm, draft-free spot is ideal for this.
- When shaping, aim for a smooth, taut ball before applying the twine. This foundation helps maintain the roundness as it bakes.
What’s the secret to perfect bread shaped like a pumpkin?
The real secret lies in the baker’s twine and the slashes. Tying the twine loosely allows the bread to rise into distinct segments, mimicking a pumpkin. The shallow slashes then guide the expansion, preventing random tears and enhancing the decorative effect, making it ideal for baking pumpkin bread for Halloween or any fall celebration.
Can I make pumpkin shaped bread ahead of time?
Absolutely! You can prepare the dough up to the first rise, then punch it down, shape it, and place it in the fridge overnight. Let it come to room temperature for about 30-60 minutes before baking to allow for a final proof, ensuring a fresh loaf for your meal.
How do I avoid common mistakes with easy pumpkin shaped rolls?
Firstly, don’t over-knead the dough; this can lead to a tough texture. Secondly, ensure your yeast is active by checking the temperature of your milk. Lastly, make sure the twine is tied loosely enough to allow for expansion but tight enough to create the segments—this is crucial for beautiful pumpkin shaped bread.
Best Ways to Serve Pumpkin Shaped Bread
Once your beautiful pumpkin shaped bread emerges from the oven, golden and fragrant, you’ll want to serve it in a way that highlights its charm and flavor. I love to present it as a stunning centerpiece, allowing guests to admire its festive shape before tearing into its soft interior.
For a warm, comforting experience, serve slices with softened butter, a drizzle of maple syrup, or a spread of homemade apple butter. It’s truly delightful alongside a hearty bowl of chili or a creamy squash soup, making it one of my favorite autumn themed bread recipes for a cozy dinner.
This bread also makes an excellent accompaniment to a holiday cheese board, adding a touch of rustic elegance. The subtle sweetness of the bread pairs wonderfully with sharp cheddar or creamy brie. Whether for a casual gathering or a formal feast, this pumpkin shaped bread is sure to impress.

Nutrition Facts for Pumpkin Shaped Bread
Understanding the nutritional content of your homemade pumpkin shaped bread can be helpful, especially when planning meals. While exact values can vary based on specific brands and ingredients used, I’ve provided a general estimate per serving (when the recipe makes 2 loaves, with 8 servings per loaf), to give you an idea of what you’re enjoying.
- Serving Size: 1 slice (approx. 1/8 of a loaf)
- Calories: 250
- Fat: 8g
- Saturated Fat: 2g
- Carbohydrates: 38g
- Fiber: 2g
- Sugar: 5g
- Protein: 7g
- Sodium: 280mg
Nutritional values are estimates and may vary based on specific ingredients used, such as the type of flour or oil.
How to Store and Reheat Pumpkin Shaped Bread
Once you’ve baked your beautiful pumpkin shaped bread, proper storage is key to keeping it fresh and delicious. I always recommend allowing it to cool completely on a wire rack before storing. This prevents condensation which can make the crust soggy, ruining your lovely decorative bread for fall.
For short-term storage, wrap the cooled bread tightly in plastic wrap or place it in an airtight container at room temperature. It will stay fresh for 2-3 days this way. If you need to keep it longer, you can refrigerate it for up to 4 days, though I find the texture is best at room temperature.
For longer preservation, this pumpkin shaped bread freezes wonderfully! Wrap individual slices or whole loaves tightly in plastic wrap, then an additional layer of aluminum foil. It will keep well in the freezer for up to 3 months. To reheat, simply thaw at room temperature, then warm gently in a preheated oven at 300°F (150°C) for 10-15 minutes, or toast individual slices until warm and soft.
Frequently Asked Questions About Pumpkin Shaped Bread
What is pumpkin shaped bread exactly?
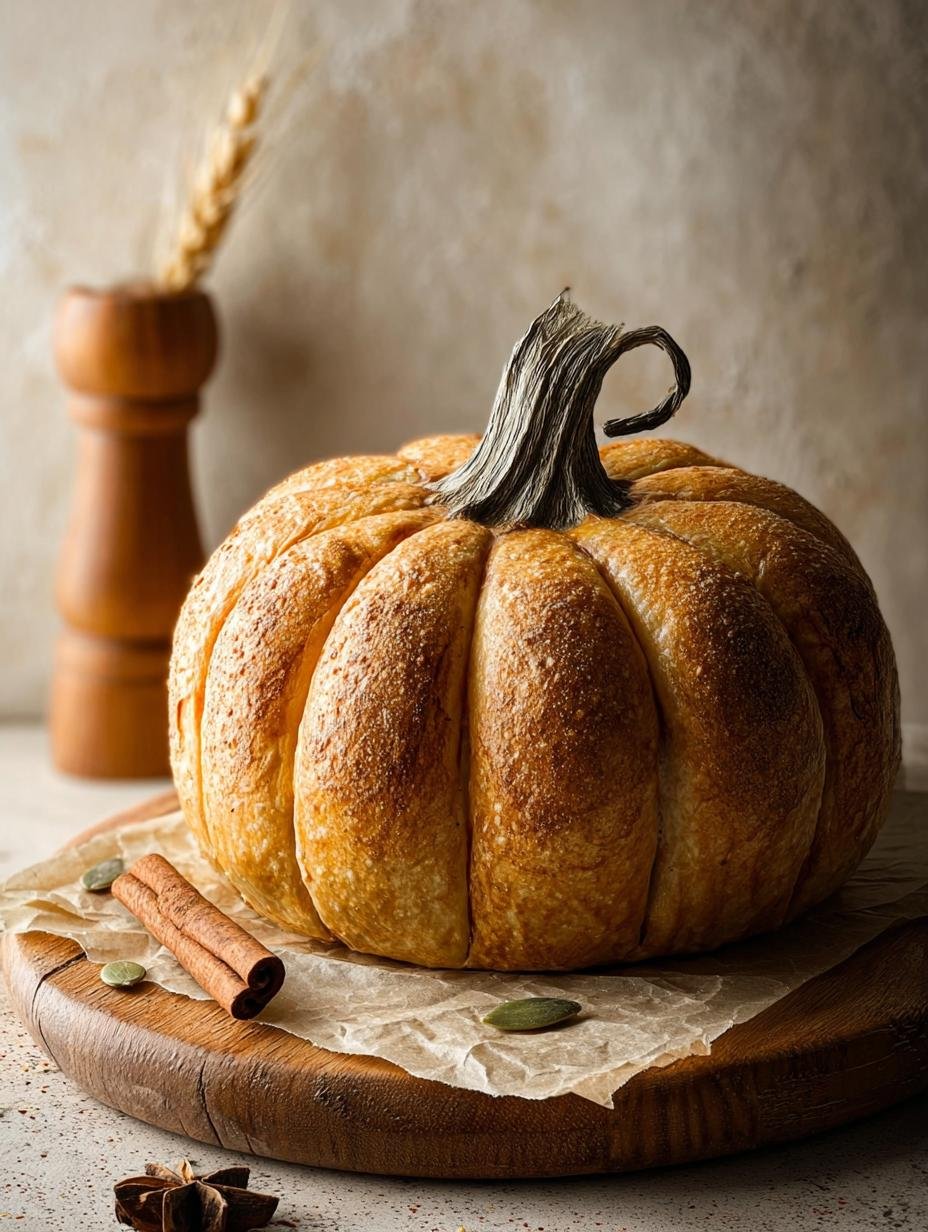
Pumpkin shaped bread is a delightful, festive loaf of bread that is artfully shaped to resemble a pumpkin. It’s typically made from a soft, slightly sweet yeast dough, and its distinctive look is achieved by tying baker’s twine around the dough before baking. This creates the characteristic ridges, making it a wonderful centerpiece for fall gatherings.
Can I use whole wheat flour for pumpkin shaped bread?
Yes, you can certainly experiment with whole wheat flour for your pumpkin shaped bread! I recommend substituting up to 50% of the bread flour with whole wheat flour to maintain a good texture. Whole wheat flour absorbs more liquid, so you might need to add an extra tablespoon or two of milk or water to achieve the right dough consistency. The result will be a heartier loaf perfect for autumn.
How do I ensure my pumpkin shaped bread gets a good “stem”?
To give your pumpkin shaped bread a perfect stem, you have a couple of options. My favorite is inserting a small cinnamon stick into the center after the bread has cooled slightly. A pretzel stick or even a small candy apple stick also works beautifully. This little detail really completes the pumpkin illusion and adds to its charm.
Is pumpkin shaped bread difficult to make for beginners?
Not at all! While the shaping might look intricate, making pumpkin shaped bread is surprisingly beginner-friendly. The key steps are familiar to anyone who has baked yeast bread before, and the twine method for shaping is quite straightforward. Just follow the instructions carefully, and you’ll be amazed at what you can create!
Variations of Pumpkin Shaped Bread You Can Try
While the classic pumpkin shaped bread recipe is a delight, there are many ways to get creative and adapt it to your taste or dietary needs. I love experimenting with different flavors and textures to keep things exciting in the kitchen. Here are a few variations you might enjoy:
- Sweet Pumpkin Spice Version: For a sweeter, dessert-like bread, incorporate 1-2 teaspoons of pumpkin pie spice into the dough. You could also add 1/2 cup of pumpkin puree for a more pronounced pumpkin flavor and a slightly softer crumb, perfect for a festive fall treat.
- Savory Herb and Cheese: If you prefer a savory loaf, omit the sugar and add 1/2 cup of shredded sharp cheddar cheese, along with 1-2 tablespoons of fresh chopped rosemary or sage. This makes a wonderful accompaniment to soups and stews.
- Whole Wheat or Gluten-Free: For a heartier loaf, substitute up to 50% of the bread flour with whole wheat flour. For a gluten-free option, use a high-quality gluten-free bread flour blend, ensuring it contains xanthan gum to help with structure.
- Pumpkin Shaped Sourdough Bread: For those who love the tangy flavor and chew of sourdough, you can adapt this recipe by using your active sourdough starter instead of instant yeast. This will require a longer proofing time, but the resulting pumpkin shaped sourdough bread is incredibly rewarding and delicious.
For more delicious recipes and cooking tips, feel free to contact us. You can also learn more about me and my culinary journey. We are committed to your privacy, as detailed in our privacy policy, and provide full transparency through our disclaimer.
PrintAmazing Pumpkin Shaped Bread: 2 Easy Steps

This pumpkin shaped bread is a delightful and festive twist on classic homemade bread. Soft, slightly sweet, and beautifully shaped, it makes a perfect centerpiece for autumn gatherings or holiday meals. With simple ingredients and straightforward steps, you can create an impressive loaf that tastes as good as it looks.
- Prep Time: 15 minutes
- Cook Time: 30 minutes
- Total Time: 1 hour 10 minutes
- Yield: 2 loaves 1x
- Category: Dessert
- Method: Baking
- Cuisine: American
- Diet: Vegetarian
Ingredients
- 28 ounces bread flour (or all-purpose, about 5 1/2 cups, spooned and leveled)
- 10 grams instant yeast (about 3 teaspoons)
- 2 ounces sugar (4 tablespoons)
- 16 ounces warm milk (110ºF) or water (2 cups)
- 1 1/2 teaspoons salt
- 2 ounces olive oil or melted butter (1/4 cup)
- Egg wash (1 egg beaten with a little water) or milk (for brushing)
- Baker’s twine (four 20-inch pieces)
- Cinnamon stick or candy apple stick (for pumpkin stem garnish, optional)
Instructions
- Warm the milk to between 110ºF and 115ºF to activate the yeast without killing it.
- In the bowl of a stand mixer fitted with the dough hook, combine the flour, instant yeast, sugar, and warm milk. Mix on low speed for one minute to start forming the dough.
- Add the salt and olive oil (or melted butter) to the mixer bowl.
- If the dough isn’t sticking to the bowl due to butter, add 1/4 cup more flour. If still not sticky enough, add 1-2 tablespoons of water to achieve the right texture.
- Mix on speed 2 for 5 minutes. Then perform the windowpane test by stretching a piece of dough between your fingers; if it forms a thin, translucent membrane without tearing, gluten is developed. If it tears, mix for 2 additional minutes.
- Turn the dough onto a lightly floured surface and knead for 4–5 turns to form a smooth ball.
- Lightly coat a large bowl with olive oil. Place the dough seam side down in the bowl to coat the top with oil, then flip it over. Cover with a cloth and let it rise in a warm area for about 25 minutes, until the dough doubles in size.
- Preheat your oven to 375ºF (190ºC).
- Divide the dough into two equal loaves. Pull the edges toward the center to shape each into a smooth ball.
- Cut four 20-inch pieces of baker’s twine and arrange them in a criss-cross pattern on a parchment-lined baking sheet.
- Position the first shaped loaf on top of the twine on the baking sheet.
- Lightly brush the top of the dough with egg wash for even browning; alternatively, use milk if you prefer.
- Loosely tie each string around the loaf to create pumpkin segments, allowing room for the bread to rise and expand. Trim off excess twine.
- Use a razor blade to make wheat-shaped slashes in each section of the pumpkin. This decorative touch also prevents tearing during baking.
- Bake for 25 to 30 minutes or until the loaves are golden brown and an internal thermometer reads 190º–200ºF (88º–93ºC).
- After baking, remove the twine. Optionally, insert a cinnamon stick or candy apple stick in the center as a pumpkin stem for decoration.
Notes
- Use instant yeast specifically for better and quicker rise.
- Adjust flour or water amounts slightly to achieve a sticky but manageable dough.
- Ensure milk or water is properly warmed to activate yeast without killing it.
- Allow the dough to rise in a warm, draft-free environment for best results.
- Egg wash enhances browning but can be substituted with milk for a subtle finish.
- Baker’s twine is key to shaping the pumpkin sections; do not substitute with regular string to avoid safety issues in the oven.
- The cinnamon stick as a stem adds aroma and festive visual appeal but is optional.
- For best texture, avoid overbaking to keep bread soft and tender inside.
Nutrition
- Serving Size: 1 loaf
- Calories: Not provided
- Sugar: Not provided
- Sodium: Not provided
- Fat: Not provided
- Saturated Fat: Not provided
- Unsaturated Fat: Not provided
- Trans Fat: Not provided
- Carbohydrates: Not provided
- Fiber: Not provided
- Protein: Not provided
- Cholesterol: Not provided


Leave a Reply