Black Velvet Halloween Cake has been my absolute go-to dessert for spooky season for years! It’s more than just a cake; it’s an experience. I remember the first time I made it, the deep, mysterious color alone was enough to get me excited. The rich, moist texture combined with that hint of chocolatey goodness, it’s the perfect treat for a chilly October night. This dark velvet Halloween cake is incredibly decadent, and the aroma filling my kitchen as it bakes is pure magic. Plus, the possibilities for a spooky black velvet cake design are endless, making every creation unique. Let’s get cooking!
Why You’ll Love This Black Velvet Halloween Cake
This isn’t just any cake; it’s a showstopper that’s surprisingly simple to whip up. You’ll adore its intensely rich, moist chocolate flavor that’s perfect for any Halloween gathering. Plus, it boasts a stunning deep black hue that screams spooky season!
- Incredible Taste: Deep, moist chocolate flavor with a hint of sweetness.
- Quick Prep Time: Get this easy black velvet Halloween cake in the oven in under 30 minutes.
- Budget-Friendly: Uses common pantry staples, making it an affordable treat.
- Family Favorite: Kids and adults alike will devour this delicious dessert.
- Visually Stunning: Its dramatic black color is perfect for a Halloween party.
- Versatile: This easy black velvet Halloween cake is a blank canvas for your spookiest decorations.
- Moist Texture: Thanks to buttermilk and oil, it stays wonderfully tender.
Ingredients for Black Velvet Halloween Cake
Gathering these black velvet Halloween cake ingredients is the first step to creating a truly show-stopping dessert. Don’t worry if you don’t have everything on hand; most are pantry staples! The buttermilk and oil are key for that incredibly moist texture, while the cocoa powder gives this cake its deep, rich flavor and dark color. We’re using both baking powder and baking soda for a good lift, and a touch of vinegar reacts with the baking soda to enhance that rise and color. For the frosting, softened cream cheese and butter create a luscious base, sweetened with powdered sugar and flavored with vanilla.
- 2 cups all-purpose flour
- 1 ¾ cups granulated sugar
- ¾ cup unsweetened cocoa powder
- 1 cup buttermilk, at room temperature
- ½ cup vegetable oil
- 3 large eggs, at room temperature
- 1 tablespoon baking powder
- 1 teaspoon baking soda
- ½ teaspoon salt
- 1 tablespoon vanilla extract
- 1 teaspoon white vinegar
- For Frosting:
- 8 oz cream cheese, softened
- ½ cup unsalted butter, softened
- 4 cups powdered sugar
- 1 teaspoon vanilla extract
- Black food coloring (optional)
How to Make Black Velvet Halloween Cake
Ready to create a spooky masterpiece? Follow these simple steps for the most delicious black velvet Halloween cake you’ve ever tasted. This recipe is designed to be straightforward, ensuring even beginner bakers can achieve stunning results. The aroma of chocolate and vanilla will fill your kitchen as you work, a sure sign of the magic to come!
- Step 1: Preheat your oven to 350°F (175°C). Thoroughly grease and flour two 9-inch round cake pans. This step is crucial to prevent sticking and ensure your beautiful cake layers release perfectly.
- Step 2: In a large bowl, whisk together the 2 cups all-purpose flour, 1 ¾ cups granulated sugar, ¾ cup unsweetened cocoa powder, 1 tablespoon baking powder, 1 teaspoon baking soda, and ½ teaspoon salt. Sifting these dry ingredients helps prevent lumps and ensures an even mix.
- Step 3: In a separate bowl, whisk together the 1 cup buttermilk, ½ cup vegetable oil, 3 large eggs, 1 tablespoon vanilla extract, and 1 teaspoon white vinegar until they are completely blended. The vinegar will react with the baking soda later, giving the cake a fantastic lift and deepening its color.
- Step 4: Gradually add your wet ingredients to the dry ingredients. Mix on low speed or with a spatula until the batter is just smooth and well incorporated. Be careful not to overmix; overmixing can lead to a tough cake. You want a glossy, rich batter.
- Step 5: Divide the batter evenly between the two prepared cake pans. A kitchen scale can help ensure even layers, but eye-balling it works too!
- Step 6: Place the cake pans in the preheated oven. Bake for 30-35 minutes. You’ll know they’re done when a toothpick inserted into the center of each cake comes out clean, and the edges begin to pull away slightly from the sides of the pans.
- Step 7: Once baked, carefully remove the cakes from the oven. Let them cool in the pans for about 10 minutes. This allows them to set slightly. Then, gently turn them out onto wire racks to cool completely. Rushing this step can cause the cakes to break.
- Step 8: While the cake layers cool, prepare your frosting. Beat together the 8 oz softened cream cheese and ½ cup softened unsalted butter until smooth and creamy. Gradually add the 4 cups powdered sugar and 1 teaspoon vanilla extract, mixing until well combined and fluffy. If you want that signature dark hue, add black food coloring a little at a time until you reach your desired shade.
- Step 9: Once the cake layers are completely cool, it’s time to assemble! Spread a generous amount of frosting on top of one cake layer. Carefully place the second layer on top, then frost the entire cake – top and sides. This is a key part of how to make black velvet Halloween cake look so professional.
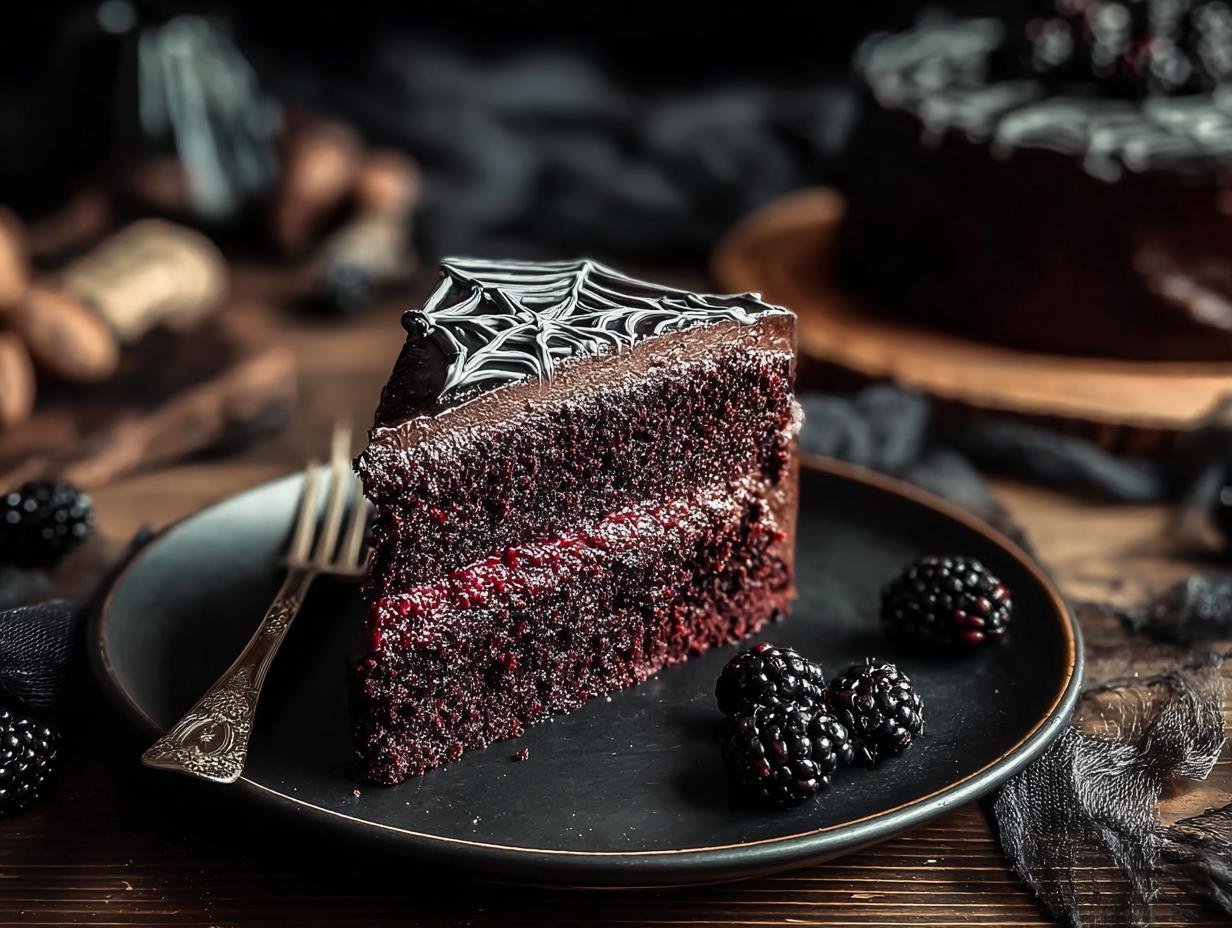
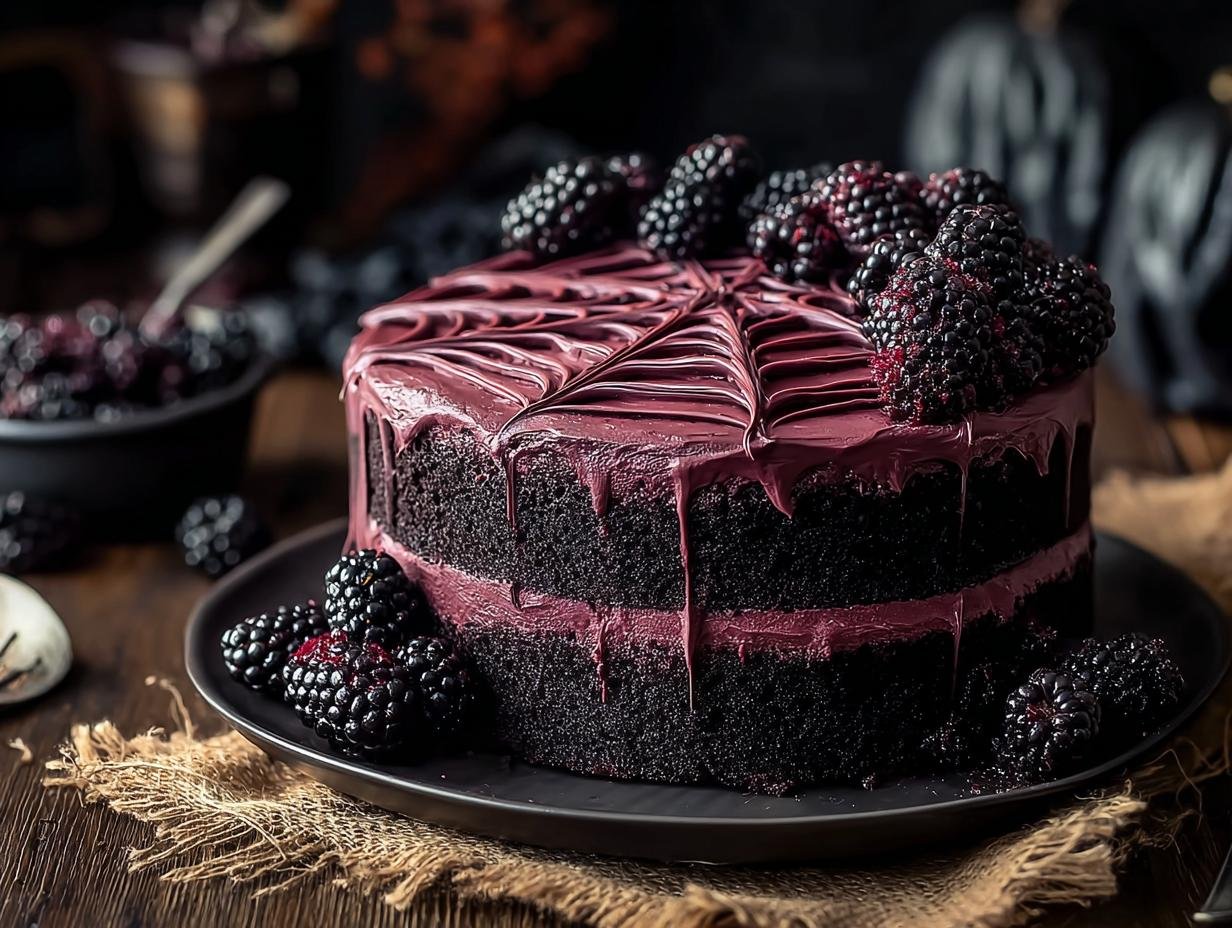
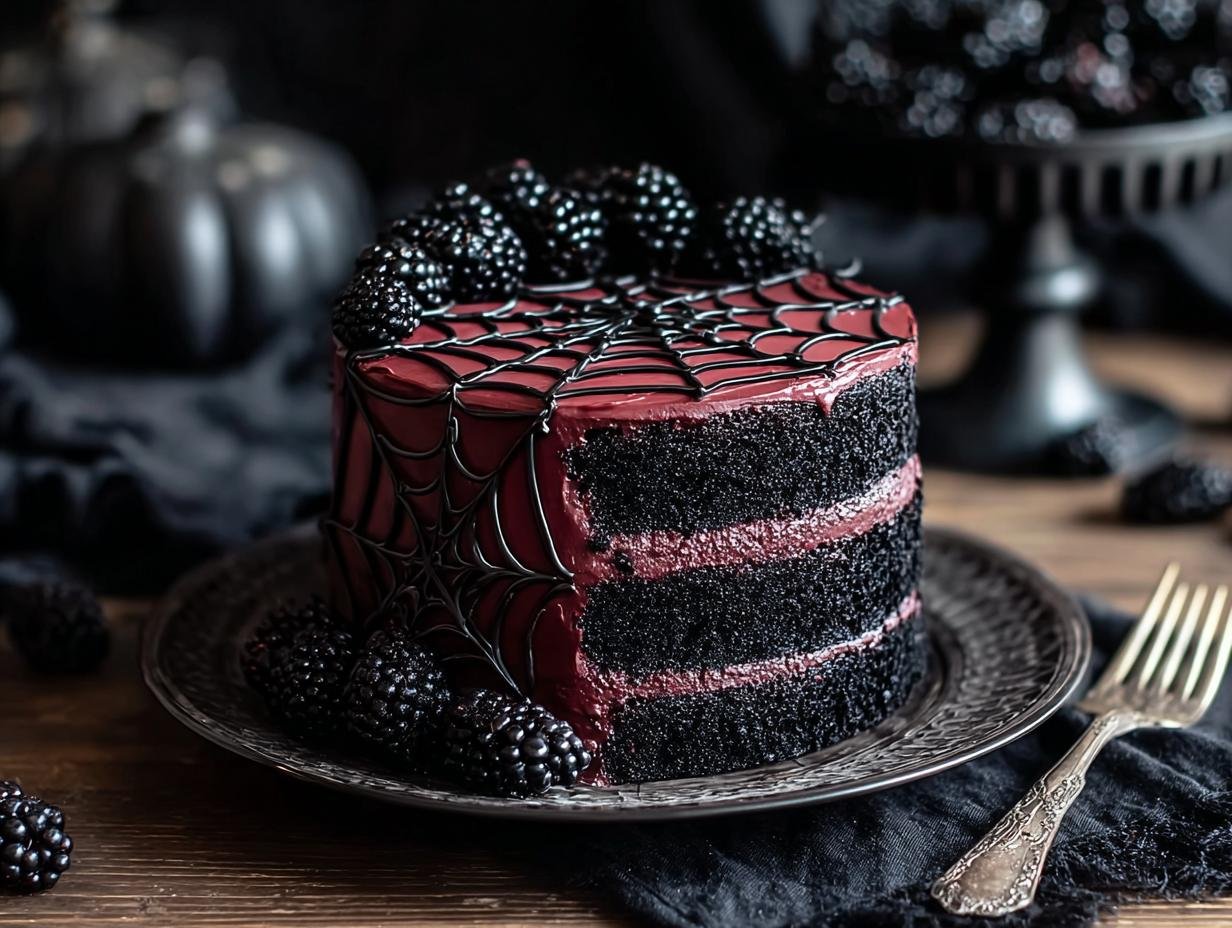
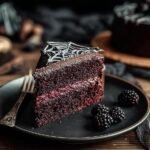
- Step 10: Now for the fun part! Decorate your black velvet Halloween cake with your favorite spooky adornments. Think edible googly eyes, chocolate spiderwebs, candy ghosts, or even a dusting of edible glitter for an extra magical touch. This makes your how to make black velvet Halloween cake journey complete and ready for your party!
Pro Tips for the Best Black Velvet Halloween Cake
Want to elevate your spooky bake? These insider tips will ensure your black velvet Halloween cake is a showstopper. From ingredient temperature to frosting consistency, a few simple tricks make all the difference. I’ve found these little adjustments truly help achieve that perfect moist texture and deep, dark color everyone loves.
- Always use room temperature ingredients, especially eggs and buttermilk. This helps them emulsify better, creating a smoother batter and a more tender cake.
- Don’t overmix the batter once the wet and dry ingredients are combined. Mix just until there are no dry streaks left to avoid a tough cake.
- For a richer flavor and deeper color, consider using Dutch-processed cocoa powder. It’s less acidic and has a smoother, more intense chocolate taste. Learn more about cocoa powder types.
- Chill the cake layers in the refrigerator for about 30 minutes before frosting. This firms them up, making them easier to handle and preventing crumbs from getting into your frosting.
What’s the secret to perfect Black Velvet Halloween Cake?
The secret to the best black velvet Halloween cake recipe lies in the balance of ingredients and proper technique. Using buttermilk and oil creates an incredibly moist crumb, while the combination of baking soda and vinegar deepens the color and enhances the rise. Don’t overmix!
Can I make Black Velvet Halloween Cake ahead of time?
Absolutely! You can bake the cake layers up to two days in advance. Once completely cooled, wrap them tightly in plastic wrap and store at room temperature. Frosting the cake the day you plan to serve it is best for optimal freshness. For more baking tips, check out our author’s advice.
How do I avoid common mistakes with Black Velvet Halloween Cake?
A common pitfall is overmixing the batter, which leads to a dense cake. Another is not letting the cake layers cool completely before frosting, which can cause the frosting to melt. Ensure your oven temperature is accurate for even baking. Baking a cake requires attention to detail.
Best Ways to Serve Black Velvet Halloween Cake
This show-stopping cake is perfect for any Halloween gathering. Its rich flavor and dramatic appearance make it the star of any dessert table. For a truly memorable Halloween party black velvet dessert experience, consider serving it with a dollop of whipped cream or a scoop of vanilla bean ice cream to complement the deep chocolate notes. A small glass of milk is also a classic pairing that kids absolutely adore.
For an extra festive touch, pair slices of this cake with some spooky-themed cookies or a warm apple cider. The contrast in flavors and textures makes each bite exciting. You can also serve it as is, letting its intense flavor and beautiful black hue speak for themselves. It’s a versatile dessert that truly shines on its own. You can learn more about our baking philosophy here.
Nutrition Facts for Black Velvet Halloween Cake
Wondering about the nutritional breakdown of this decadent treat? Here’s an approximate guide for one slice of this delicious black velvet Halloween cake. It’s a rich dessert, perfect for enjoying during the festive Halloween season.
- Serving Size: 1 slice
- Calories: Approx. 450 kcal
- Fat: Approx. 25g
- Saturated Fat: Approx. 15g
- Protein: Approx. 5g
- Carbohydrates: Approx. 55g
- Fiber: Approx. 3g
- Sugar: Approx. 50g
- Sodium: Approx. 250mg
Nutritional values are estimates and may vary based on specific ingredients and portion sizes used.
How to Store and Reheat Black Velvet Halloween Cake
Properly storing your beautiful black velvet Halloween cake ensures it stays as moist and delicious as the day you baked it. Once your cake has completely cooled on a wire rack—this is super important to prevent condensation—it’s ready for storage. For short-term enjoyment, wrap the frosted cake tightly in plastic wrap, then place it in an airtight container. This method keeps it fresh in the refrigerator for about 3-4 days. This is a great way to manage your spooky dessert preparations!
If you need to store it for longer, freezing is your best friend. Wrap individual slices securely in plastic wrap, followed by a layer of aluminum foil, and then place them in an airtight container or freezer bag. Your black velvet Halloween cake can be frozen for up to 3 months. When you’re ready to enjoy a slice, thaw it overnight in the refrigerator. For a quick treat, you can gently reheat individual slices in the microwave for about 10-15 seconds, which really brings out that deep chocolate flavor!
Frequently Asked Questions About Black Velvet Halloween Cake
What makes this cake “Black Velvet”?
The “Black Velvet” name comes from its incredibly deep, almost black color and its luxuriously smooth, moist texture. Unlike red velvet, which gets its color from red food coloring and a hint of cocoa, this cake relies on a significant amount of black cocoa powder or a combination of cocoa and black food coloring to achieve its dramatic, dark hue. It’s a true showstopper, perfect for a spooky black velvet cake for Halloween.
Can I use regular cocoa powder instead of black cocoa powder?
You can certainly use regular unsweetened cocoa powder if black cocoa isn’t available. However, the cake won’t be as intensely black; it will be more of a deep brown. To achieve a true black color with regular cocoa, you’ll likely need to add a good amount of black food coloring. The flavor will still be rich and chocolatey, making it a delicious black velvet cake for Halloween, just visually different.
How can I make my Black Velvet Halloween Cake extra moist?
The recipe already includes ingredients like buttermilk and vegetable oil, which are fantastic for moisture. To ensure an extra-moist cake, be careful not to overmix the batter, as this develops the gluten and can make the cake tough. Also, make sure not to overbake it! Test for doneness with a toothpick; it should come out with a few moist crumbs attached, not completely dry. This is key for that signature tender crumb in a black velvet cake for Halloween.
What are some simple Halloween decorations for this cake?
For a quick and spooky look, you can top the frosted cake with candy eyeballs, chocolate spiderwebs (melt chocolate and pipe webs onto parchment paper, let set, then place on cake), gummy worms, or even edible glitter for a magical sparkle. Orange and black sprinkles are also a festive and easy addition. These simple touches really elevate the cake as a fun black velvet cake for Halloween treat.
Variations of Black Velvet Halloween Cake You Can Try
While this classic black velvet Halloween cake is already a showstopper, you can easily switch things up to suit your taste or dietary needs. I love experimenting with different versions each year! For those who adore an even deeper chocolate flavor, a dark chocolate velvet Halloween cake variation is a must-try. Simply substitute some of the all-purpose flour with an equal amount of dark cocoa powder or add a shot of espresso to the batter to intensify the chocolate notes.
If you’re looking for a gluten-free option, swap the all-purpose flour for a good quality gluten-free baking blend. You might need to slightly adjust the liquid if the batter seems too thick or thin. For a quicker method, consider baking this recipe as cupcakes. They’ll bake faster, usually in about 18-22 minutes, and are perfect for individual servings at a Halloween party. Don’t forget to try a white chocolate buttercream frosting for a striking contrast!
PrintSpooky Black Velvet Halloween Cake: 1 Day Prep
Learn how to make a Black Velvet Halloween Cake, a rich, moist, and decadent chocolate cake perfect for spooky celebrations. This recipe features a deep black hue and a creamy frosting, with options for festive Halloween decorations.
- Prep Time: 25 minutes
- Cook Time: 30-35 minutes
- Total Time: 1 hour 15 minutes
- Yield: 12 servings 1x
- Category: Dessert
- Method: Baking
- Cuisine: American
- Diet: Vegetarian
Ingredients
- 2 cups all-purpose flour
- 1 ¾ cups granulated sugar
- ¾ cup unsweetened cocoa powder
- 1 cup buttermilk
- ½ cup vegetable oil
- 3 large eggs
- 1 tablespoon baking powder
- 1 teaspoon baking soda
- ½ teaspoon salt
- 1 tablespoon vanilla extract
- 1 teaspoon white vinegar
- For Frosting:
- 8 oz cream cheese, softened
- ½ cup unsalted butter, softened
- 4 cups powdered sugar
- 1 teaspoon vanilla extract
- Black food coloring (optional)
Instructions
- Preheat your oven to 350°F (175°C). Grease and flour two 9-inch round cake pans.
- In a large bowl, sift together the flour, granulated sugar, cocoa powder, baking powder, baking soda, and salt.
- In another bowl, whisk together the buttermilk, vegetable oil, eggs, vanilla extract, and vinegar until well blended.
- Gradually add your wet ingredients to the dry ingredients, mixing until the batter is smooth and well incorporated.
- Divide the batter evenly between the prepared cake pans.
- Place the cake pans in the preheated oven and bake for 30-35 minutes, or until a toothpick inserted in the center comes out clean.
- Remove the cakes from the oven and allow them to cool in the pans for about 10 minutes. Then, turn them out onto wire racks to cool completely.
- Beat together the softened cream cheese and butter in a bowl until smooth. Gradually add powdered sugar and vanilla extract, mixing until well combined. Add black food coloring to achieve your desired shade.
- Once the cake layers are completely cool, spread frosting on top of one layer, then place the second layer on top. Frost the top and sides of the cake.
- Use Halloween-themed decorations like edible eyes, chocolate spiders, or ghost-shaped marshmallows to enhance the spooky look of your Black Velvet Halloween Cake.
Notes
- For the best flavor, select high-quality cocoa powder and ensure your ingredients are fresh.
- Prepare the cake layers a day in advance; this can enhance their flavor and save time on the event day.
- Feel free to add a touch of orange zest to your cream cheese frosting for a seasonal twist.
- Warm up individual slices in the microwave for a few seconds; the cake stays moist and the flavors intensify.
- If you prefer less sweetness, consider reducing the amount of powdered sugar for the frosting or use a lighter frosting option.
- To make this a gluten-free Black Velvet Halloween Cake, substitute all-purpose flour with a gluten-free flour blend.
- Chill the frosted cake before applying fondant for easier decoration.
- Store the Black Velvet Halloween Cake in the refrigerator; it stays fresh for 4-5 days when properly covered.
- Freeze slices tightly wrapped in plastic wrap and then in an airtight container for up to 3 months.
Nutrition
- Serving Size: 1 slice
- Calories: Approx. 450 kcal
- Sugar: Approx. 50g
- Sodium: Approx. 250mg
- Fat: Approx. 25g
- Saturated Fat: Approx. 15g
- Unsaturated Fat: Approx. 10g
- Trans Fat: 0g
- Carbohydrates: Approx. 55g
- Fiber: Approx. 3g
- Protein: Approx. 5g
- Cholesterol: Approx. 80mg


Leave a Reply