Ghoul Face Sandwiches have been a Halloween tradition in my house for years, transforming simple lunches into spooky, edible art! I remember the first time I tried making them with my niece; her eyes lit up as we used olives for eyes and bell peppers for monstrous grins. The smell of the creamy spread and fresh vegetables filled the kitchen, promising a fun and delicious treat. These aren’t just any sandwiches; they’re a chance to get creative and make something truly special. If you’re looking for a way to add some frightfully fun flair to your Halloween celebrations, these Halloween ghoul face sandwiches are the perfect answer. Let’s get crafting!
Why You’ll Love This Ghoul Face Sandwiches Recipe
These aren’t just any sandwiches; they’re a portal to spooky fun! Here’s why this recipe is a Halloween must-have:
- Unleash your inner artist: Get creative with toppings to design unique spooky characters.
- Super simple to assemble: These are truly easy ghoul face sandwiches, perfect for little hands to help with.
- Crowd-pleasing appeal: From toddlers to adults, everyone loves a fun, edible ghoul face.
- Versatile for any occasion: Ideal for Halloween parties, spooky lunches, or just a fun weekend treat.
- Healthy-ish Halloween fun: You can load them up with veggies, making them a great option for kid-friendly ghoul face sandwiches.
- Quick to prepare: Minimal prep time means more time for Halloween fun.
- Customizable for picky eaters: Let everyone build their own monster masterpiece.
Ingredients for Ghoul Face Sandwiches
Whipping up these spooky delights is a breeze with just a few simple ingredients. They’re the perfect base for all sorts of spooky ghoul face sandwich ideas!
- 8 slices of bread – I like using white or whole wheat, but feel free to experiment!
- 4 ounces of cream cheese, softened – This makes the best base for our ghoul faces, creating a smooth, spreadable surface.
- 1/4 cup of mayonnaise – Mixed with the cream cheese, it adds a lovely creaminess and helps everything stick.
- 1/2 cup of shredded carrots – These add a pop of color and a bit of sweetness, perfect for ghoul hair or rosy cheeks.
- 1/2 cup of sliced cucumber – Thinly sliced, they make great ghostly features or cool, green skin.
- 1/2 cup of black olives, sliced – Absolutely essential for those classic creepy eyes and mouths!
- 1/2 cup of bell pepper, sliced into strips – Red, green, or yellow peppers can be cut into fun shapes for noses, ears, or even fiery tongues.
- 1/2 cup of ham or turkey slices – If you’re adding a protein layer, these work wonderfully.
- Fresh parsley, for garnish (optional) – A little green can add a touch of freshness or a spooky vine effect.
- 1 tablespoon of food coloring (optional) – For extra ghoulish fun, tint your cream cheese mixture purple, green, or orange!
How to Make Ghoul Face Sandwiches
Ready to bring some spooky fun to your kitchen? Making these Ghoul Face Sandwiches is a blast, and it’s so easy to get creative. Let’s dive into how to craft these edible monsters!
- Step 1: Start by laying out your 8 slices of bread on a clean cutting board or countertop. This is your canvas for our ghoul creations!
- Step 2: In a medium bowl, combine the 4 ounces of softened cream cheese with the 1/4 cup of mayonnaise. If you’re feeling extra spooky, now’s the time to add a tablespoon of food coloring to achieve ghoul-like hues of purple, green, or even a creepy orange. Mix until it’s smooth and evenly colored.
- Step 3: Take a spatula or butter knife and spread this creamy mixture generously onto one side of each bread slice. Make sure to get a nice, even layer all the way to the edges.
- Step 4: For the sandwiches that will be the base, layer your chosen fillings. I like to start with the 1/2 cup of ham or turkey slices, followed by a nice sprinkle of 1/2 cup of shredded carrots and then a few slices of 1/2 cup of cucumber. These layers add texture and flavor.
- Step 5: Carefully place the remaining bread slices on top of the fillings, with the cream cheese side facing down. Gently press down to secure everything. These are the beginnings of your how to make ghoul face sandwiches masterpieces.
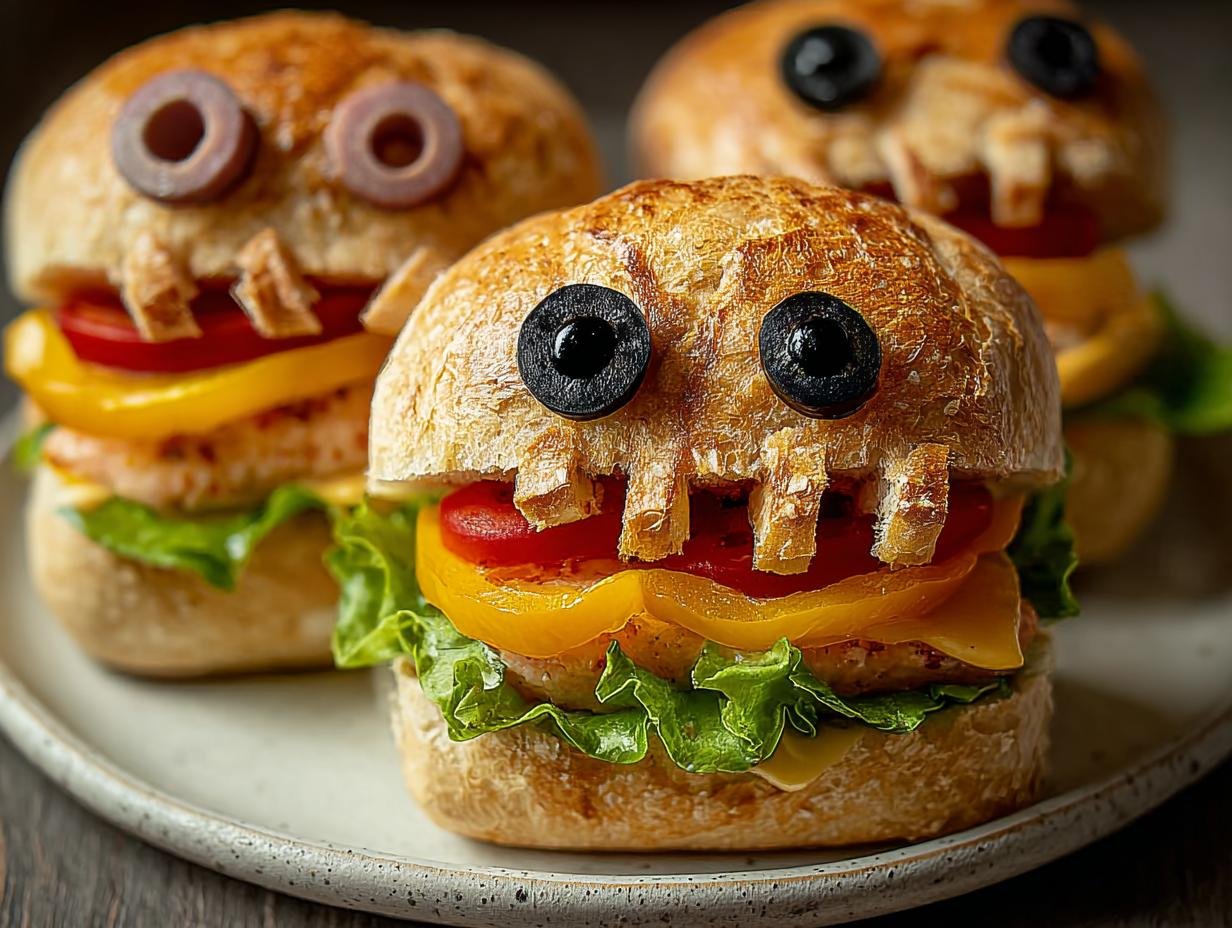
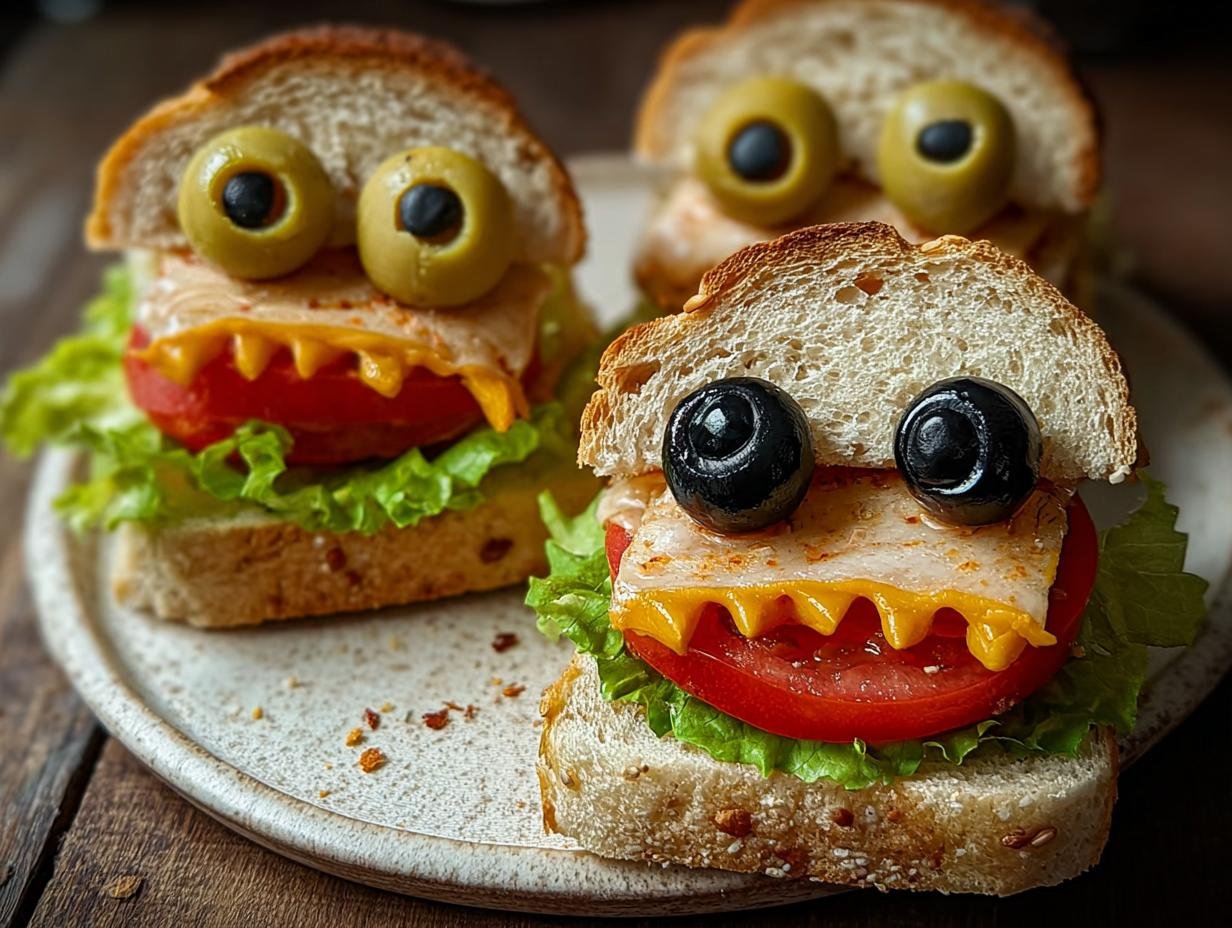
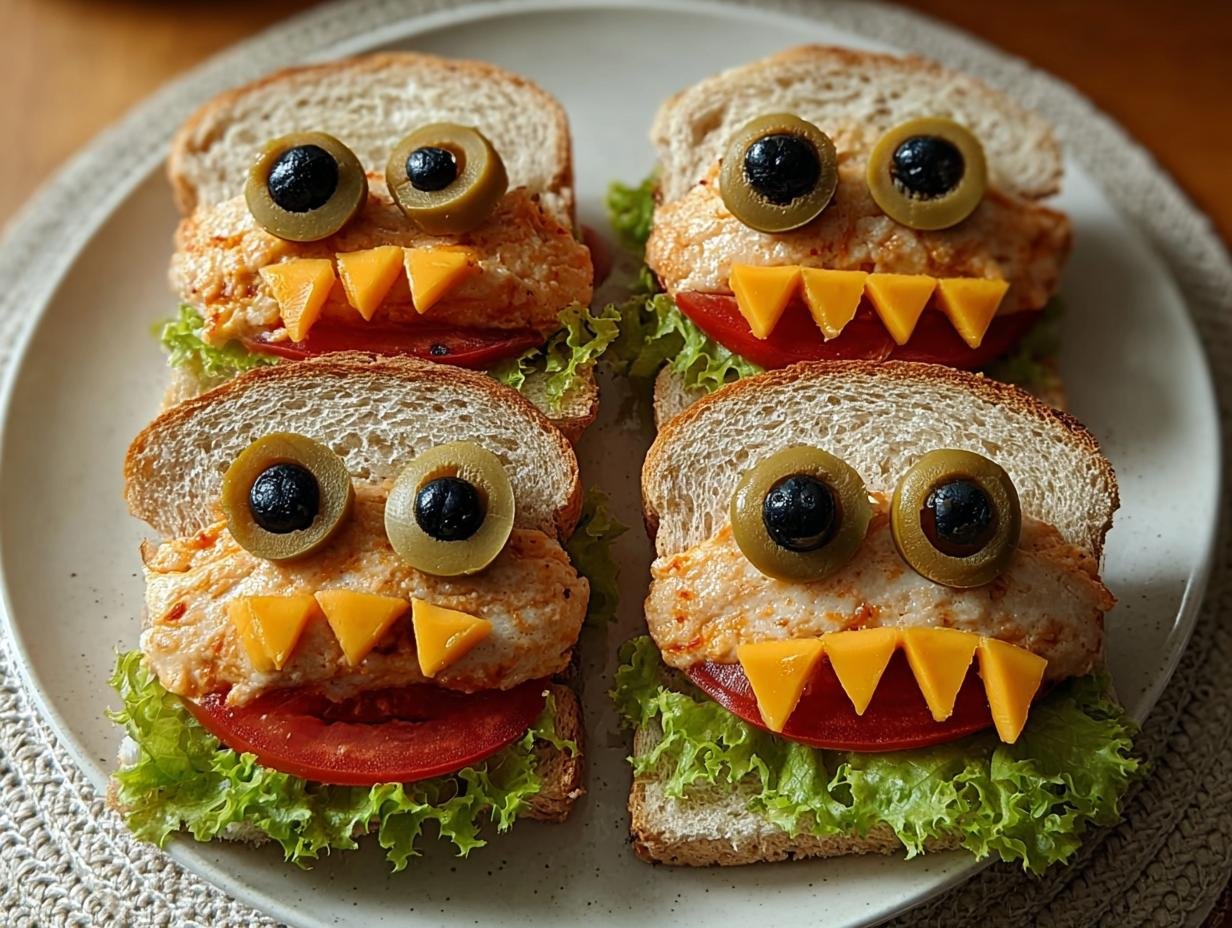
- Step 6: Now for the fun part – decorating! Use the 1/2 cup of sliced black olives to create eyes, noses, or even a row of sharp teeth. Cut the 1/2 cup of bell pepper strips into fun shapes for ears, eyebrows, or a monstrous grin. This is where your ghoul sandwich lunchbox ideas really come to life!
- Step 7: Once your ghoul faces are complete, you can cut the sandwiches. I usually slice them into quarters or fun triangles. Arrange them on a platter. If you’re using fresh parsley, tuck a few sprigs around the sandwiches for a bit of creepy greenery.
- Step 8: Serve your wonderfully spooky Ghoul Face Sandwiches right away for the freshest taste and best presentation. They’re sure to be a hit!
Pro Tips for the Best Ghoul Face Sandwiches
Want to take your ghoul sandwiches from spooky to spectacular? I’ve learned a few tricks over the years that make these creations even more fun and delicious. Experimenting with different toppings is key to achieving unique and creative ghoul face sandwich designs.
- Embrace the Color: Don’t shy away from food coloring in your cream cheese spread! Purple, green, and even black can really amp up the Halloween vibe.
- Texture Play: Mix and match your fillings. Crunchy cucumbers and bell peppers alongside softer ham or turkey create a delightful contrast.
- Go Wild with Garnishes: Beyond olives and peppers, think about using small pieces of different colored bell peppers for noses, ears, or even horns.
- Presentation Matters: Arrange your finished sandwiches on a platter with some plastic spider rings or fake cobwebs for a truly festive display.
What’s the secret to perfect Ghoul Face Sandwiches?
The secret is definitely in the spread! A good ratio of cream cheese to mayonnaise ensures a creamy, spreadable base that holds all your toppings. Mastering ghoul face sandwich decorating makes them look amazing. For more on food preparation techniques, you can explore resources on basic kitchen skills.
Can I make Ghoul Face Sandwiches ahead of time?
Yes! These are fantastic for ghoul sandwich party food. Assemble them up to 24 hours in advance, cover them tightly with plastic wrap, and refrigerate. Add the final face details just before serving to keep them fresh and crisp.
How do I avoid common mistakes with Ghoul Face Sandwiches?
To avoid distorted designs and ensure you make cute ghoul face sandwiches, don’t overload the bread with fillings. Also, make sure your cream cheese mixture isn’t too thin, or your toppings might slide off. Slice ingredients like olives and peppers thinly so they adhere well. You can find more tips on food presentation from culinary experts.
Best Ways to Serve Ghoul Face Sandwiches
These Ghoul Face Sandwiches are so much fun, they practically beg to be the star of any Halloween gathering! For a full spread, consider serving them alongside some “Witch Finger” pretzel sticks or a spooky “Graveyard Taco Dip.” They also make an incredibly memorable addition to Halloween lunch ideas ghoul face platters for school parties or themed get-togethers. Another great idea is to pair them with a vibrant “Monster Smoothie” made with spinach and fruit for a pop of color. Present them on a platter adorned with plastic spiders or cobwebs to really set the spooky mood!
Nutrition Facts for Ghoul Face Sandwiches
Creating these fun edible ghoul creations is a delightful way to celebrate Halloween! Here’s a general idea of what you can expect per serving of these Ghoul Face Sandwiches, though exact numbers will vary based on your specific ingredient choices and sandwich size.
- Calories: Approx. 250-300
- Fat: Moderate
- Saturated Fat: Moderate
- Protein: Moderate
- Carbohydrates: Moderate
- Fiber: Low
- Sugar: Low
- Sodium: Moderate
Nutritional values are estimates and may vary based on specific ingredients used. For more detailed nutritional information, consult a registered dietitian or use an online nutritional calculator.
How to Store and Reheat Ghoul Face Sandwiches
These spooky edible ghoul face creations are best enjoyed fresh, but I know sometimes life gets busy! If you have leftovers or want to prep ahead, storing them is quite simple. After they’ve cooled completely, place your Ghoul Face Sandwiches in an airtight container. They’ll keep well in the refrigerator for about 3 to 4 days. For longer storage, you can freeze them! Assemble the sandwiches without the delicate face toppings (like olives and peppers), wrap them tightly in plastic wrap, and then in foil. They can stay frozen for up to 3 months.
To reheat, it’s best to thaw frozen sandwiches in the refrigerator overnight. If they seem a little dry after thawing, you can gently warm them in a toaster oven at a low temperature for a few minutes, or simply enjoy them cold and add fresh toppings. Just be gentle to keep those ghoul faces looking their best!
Frequently Asked Questions About Ghoul Face Sandwiches
What are Ghoul Face Sandwiches?
Simply put, Ghoul Face Sandwiches are a fun and creative way to transform ordinary sandwiches into spooky, edible art for Halloween! We use common sandwich ingredients like bread, spreads, and veggies to craft various monster or ghoul-like faces. They’re a fantastic way to get kids excited about eating and add a festive touch to any Halloween event. You can learn more about the history of Halloween traditions on History.com.
Why make Ghoul Face Sandwiches?
Making these sandwiches is a fantastic way to inject some playful spirit into Halloween! They’re incredibly versatile, making them perfect for kid-friendly ghoul face sandwiches or as unique ghoul sandwich party food. Plus, they offer a chance to be creative with your food, turning mealtime into a fun activity that everyone, especially children, will enjoy. They’re a memorable way to make Halloween treats!
Can I make the cream cheese spread for Ghoul Face Sandwiches ahead of time?
Absolutely! Preparing the cream cheese and mayonnaise mixture a day in advance is a great time-saver. Just store it in an airtight container in the refrigerator. When you’re ready to assemble, let it sit at room temperature for about 10-15 minutes to soften slightly, making it easier to spread for your ghoul face sandwich decorating fun.
What are some other fun Halloween sandwich ideas besides ghoul faces?
Beyond ghoul faces, you can create other spooky characters! Think “Monster Mouths” using strawberry slices for teeth, “Spider Sandwiches” with pretzel sticks for legs, or “Mummy Sandwiches” wrapped in strips of cheese or dough. The possibilities are endless when you’re thinking about fun Halloween sandwich recipes!
Variations of Ghoul Face Sandwiches You Can Try
These Ghoul Face Sandwiches are just the beginning! I love experimenting with different twists to keep things exciting for Halloween. These variations are perfect for anyone looking for new fun Halloween sandwich recipes or wanting to cater to specific needs.
- Vegetarian Ghouls: Skip the ham or turkey and load up on extra veggies! Grilled zucchini strips, spinach leaves, or sprouts can make fantastic ghoul features. For a truly green ghoul, add avocado slices.
- Sweet Monster Faces: For a dessert or sweet snack version, use a base of peanut butter or almond butter. Slice bananas for smiles and use strawberry slices or blueberries for eyes and noses. These are some of my favorite monster face sandwiches for kids!
- “Toasted” Spooky Bites: While typically no-cook, you can lightly toast your bread before spreading for a delightful crunch. This adds a different texture and warmth, making them a bit more substantial.
- Mini Ghoul Bites: Use cookie cutters to create fun shapes from your bread slices before assembling. Mini ghoul faces are perfect for little hands or as part of a larger Halloween appetizer spread.
If you’d like to learn more about me and my culinary adventures, feel free to visit my about me page.
For any inquiries or to get in touch, please use the contact us form.
Please review our privacy policy for information on data handling.
This website operates under a disclaimer regarding nutritional information and general advice.
Content is often contributed by authors like pinpanpro.
PrintGhoul Face Sandwiches: 1 Spooky & Easy Recipe
Ghoul Face Sandwiches are a fun and creative Halloween treat. This recipe makes spooky, edible art that kids and adults will love. They are perfect for parties or as a fun lunch.
- Prep Time: 20 minutes
- Cook Time: 0 minutes
- Total Time: 20 minutes
- Yield: 8 sandwiches 1x
- Category: Appetizer
- Method: No-Cook
- Cuisine: American
- Diet: Vegetarian
Ingredients
- 8 slices of bread (white or whole wheat)
- 4 ounces of cream cheese, softened
- 1/4 cup of mayonnaise
- 1/2 cup of shredded carrots
- 1/2 cup of sliced cucumber
- 1/2 cup of black olives, sliced
- 1/2 cup of bell pepper, sliced into strips
- 1/2 cup of ham or turkey slices
- Fresh parsley, for garnish (optional)
- 1 tablespoon of food coloring (optional)
Instructions
- Lay out your bread slices on a clean surface.
- In a bowl, combine softened cream cheese and mayonnaise. Add food coloring if desired for spooky colors.
- Spread the cream cheese mixture evenly onto one side of each bread slice.
- On half of the bread slices, layer ham or turkey, followed by shredded carrots and cucumber slices.
- Close the sandwiches with the remaining bread slices, spread side down.
- Use black olives to create eyes and mouths on each sandwich face. Cut bell pepper into shapes for other features.
- Cut the sandwiches into quarters or triangles. Arrange on a platter. Garnish with parsley if using.
- Serve your Ghoul Face Sandwiches immediately.
Notes
- Use fresh ingredients for the best taste and appearance.
- Encourage creativity by letting guests design their own ghoul faces.
- Be aware of any guest allergies or dietary restrictions.
- Consider setting up a sandwich-making station for interactive fun.
- For a vegetarian option, use spinach, sprouts, or grilled zucchini instead of meat.
- Try different bread types like whole grain, rye, or gluten-free.
- For a sweet version, use nut butter and fruits like bananas and strawberries.
- These sandwiches are best enjoyed fresh but can be stored in an airtight container in the refrigerator for up to two days.
- To freeze, assemble sandwiches without toppings, wrap tightly, and store for up to a month. Thaw in the refrigerator before serving.
Nutrition
- Serving Size: 1 sandwich
- Calories: Approx. 250-300 (will vary based on ingredients)
- Sugar: Low
- Sodium: Moderate
- Fat: Moderate
- Saturated Fat: Moderate
- Unsaturated Fat: Low
- Trans Fat: 0g
- Carbohydrates: Moderate
- Fiber: Low
- Protein: Moderate
- Cholesterol: Moderate





Leave a Reply