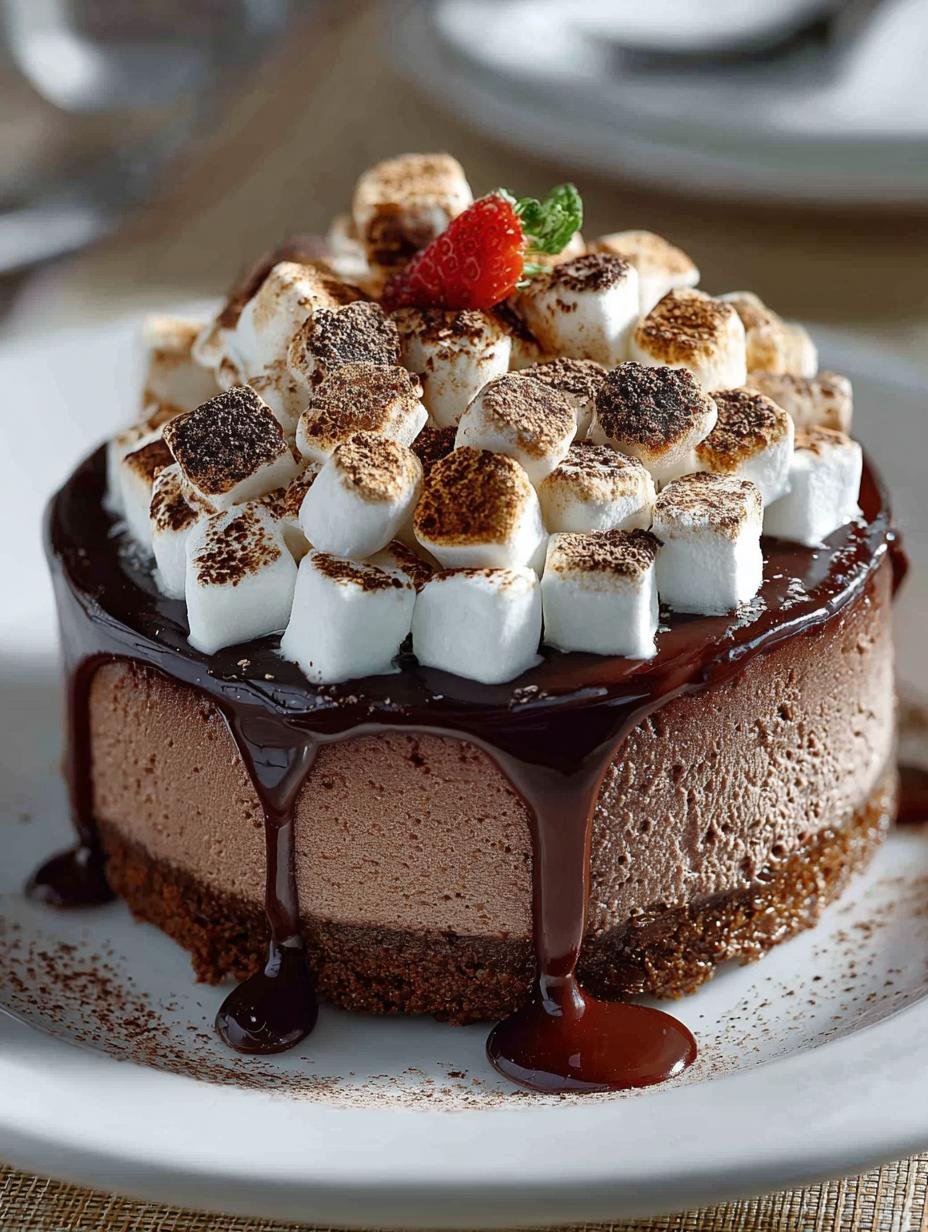
Hot Cocoa Cheesecake is the ultimate indulgence for chocolate lovers, beautifully combining the rich flavors of hot cocoa with the creamy texture of cheesecake. This decadent dessert features a chocolate cookie crust, a smooth cheesecake filling made with hot cocoa mix, and is topped with a light, fluffy marshmallow whipped cream. With its cozy flavors, this cheesecake will warm your heart and satisfy your sweet tooth, making it a perfect choice for winter gatherings and special occasions.
Why You’ll Love This Hot Cocoa Cheesecake
This Hot Cocoa Cheesecake is not just a dessert; it’s an experience. You will adore it for so many reasons. First, it brings the comforting flavors of hot chocolate into a rich and creamy cheesecake, making it a perfect winter treat. Second, the chocolate cookie crust adds a delightful crunch that complements the smooth filling. Third, it’s easy to make—perfect for those who seek an Easy Hot Cocoa Cheesecake Recipe. Fourth, it’s a crowd-pleaser, guaranteed to wow your guests at any gathering. Plus, this cheesecake is vegetarian, making it suitable for various diets. Whether it’s a holiday party or a cozy evening at home, this cheesecake is sure to impress everyone.
Ingredients for Hot Cocoa Cheesecake
Gather these items:
- 2 cups chocolate cookie crumbs
- 1/2 cup unsalted butter (melted)
- 16 oz cream cheese (room temperature)
- 1 cup granulated sugar
- 3 large eggs (room temperature)
- 1 cup hot cocoa mix
- 1 cup heavy cream
- 1 cup marshmallow fluff
How to Make Hot Cocoa Cheesecake Step-by-Step
- Step 1: Preheat the oven to 325°F (165°C). Place a roasting pan filled with hot water on the bottom rack to create a water bath.
- Step 2: In a bowl, mix the chocolate cookie crumbs with melted butter. Press firmly into the bottom of a springform pan.
- Step 3: In a large bowl, beat the cream cheese and granulated sugar until smooth and creamy.
- Step 4: Add the eggs one at a time, mixing well after each addition, then blend in the hot cocoa mix.
- Step 5: Pour the cheesecake filling over the prepared crust and smooth the top.
- Step 6: Place the springform pan in the oven and bake for 50–60 minutes, until the edges are set and the center still slightly jiggles.
- Step 7: Turn off the oven and let the cheesecake cool inside for 1 hour with the door slightly open.
- Step 8: Transfer to the refrigerator and chill for at least 4 hours, preferably overnight.
- Step 9: Whip the heavy cream to soft peaks, then gently fold in the marshmallow fluff.
- Step 10: Spread the marshmallow whipped cream over the chilled cheesecake before slicing and serving.

Pro Tips for the Perfect Hot Cocoa Cheesecake
Keep these in mind:
- This cheesecake is best served chilled.
- Allow the cheesecake to cool completely before refrigerating.
- For a more intense chocolate flavor, consider adding a bit of espresso powder to the filling.
- Use high-quality cocoa powder for a richer taste.
- Make sure all dairy ingredients are at room temperature for a smoother batter.
Best Ways to Serve Hot Cocoa Cheesecake
When serving your Hot Cocoa Cheesecake, consider these delightful ideas:
- Top with extra marshmallows for a festive touch, making it a perfect Hot Cocoa Cheesecake with Marshmallows.
- Drizzle with chocolate sauce for an indulgent presentation.
- Pair it with a hot cup of cocoa or coffee for a complementary flavor experience.
How to Store and Reheat Hot Cocoa Cheesecake
To store your cheesecake, cover it tightly with plastic wrap and keep it in the refrigerator. It will stay fresh for up to 5 days. If you want to prepare it ahead for meal prep, consider making it a day in advance. Reheat individual slices in the microwave for about 15-20 seconds if desired.
Frequently Asked Questions About Hot Cocoa Cheesecake
What’s the secret to perfect Hot Cocoa Cheesecake?
The secret lies in ensuring that all ingredients are at room temperature before mixing. This helps to create a smooth, creamy batter without lumps. Additionally, using high-quality cocoa enhances the chocolate flavor, making this cheesecake truly special.
Can I make Hot Cocoa Cheesecake ahead of time?
Absolutely! In fact, it’s recommended to make this cheesecake a day ahead, allowing it to chill overnight. This not only improves the flavor but also helps the texture set properly, giving you the best results when serving.
How do I avoid common mistakes with Hot Cocoa Cheesecake?
One common mistake is overbaking the cheesecake. Keep an eye on it and remove it from the oven when the center is still slightly jiggly. Also, ensure you use a water bath to prevent cracking and achieve a smooth surface.
Variations of Hot Cocoa Cheesecake You Can Try
Feel free to experiment with different variations of this Hot Cocoa Cheesecake:
- For a No-Bake Hot Cocoa Cheesecake, skip the baking step and use gelatin to set the filling.
- Add peppermint extract for a refreshing twist, perfect for the holiday season.
- Incorporate crushed candy canes as a topping for a festive touch.
- Try different flavored whipped creams or toppings, like caramel or chocolate curls, to customize your cheesecake.

For more information about cheesecake recipes, visit our about page. If you have any questions, feel free to contact us. You can also check our privacy policy for more details.
For a deeper understanding of the benefits of using high-quality cocoa, you can read this article on Healthline.
PrintDecadent Hot Cocoa Cheesecake: 8 Irresistible Slices

Decadent Hot Cocoa Cheesecake with Marshmallow Whipped Cream
- Prep Time: 20 minutes
- Cook Time: 60 minutes
- Total Time: 80 minutes
- Yield: 8 servings 1x
- Category: Dessert
- Method: Baking
- Cuisine: American
- Diet: Vegetarian
Ingredients
- 2 cups chocolate cookie crumbs
- 1/2 cup unsalted butter (melted)
- 16 oz cream cheese (room temperature)
- 1 cup granulated sugar
- 3 large eggs (room temperature)
- 1 cup hot cocoa mix
- 1 cup heavy cream
- 1 cup marshmallow fluff
Instructions
- Preheat the oven to 325°F (165°C). Place a roasting pan filled with hot water on the bottom rack to create a water bath.
- In a bowl, mix the chocolate cookie crumbs with melted butter. Press firmly into the bottom of a springform pan.
- In a large bowl, beat the cream cheese and sugar until smooth and creamy.
- Add the eggs one at a time, mixing well after each addition, then blend in the hot cocoa mix.
- Pour the cheesecake filling over the prepared crust and smooth the top.
- Place the springform pan in the oven and bake for 50–60 minutes, until the edges are set and the center still slightly jiggles.
- Turn off the oven and let the cheesecake cool inside for 1 hour with the door slightly open.
- Transfer to the refrigerator and chill for at least 4 hours, preferably overnight.
- Whip the heavy cream to soft peaks, then gently fold in the marshmallow fluff.
- Spread the marshmallow whipped cream over the chilled cheesecake before slicing and serving.
Notes
- This cheesecake is best served chilled.
- Allow the cheesecake to cool completely before refrigerating.
Nutrition
- Serving Size: 1 slice
- Calories: 350
- Sugar: 30g
- Sodium: 200mg
- Fat: 25g
- Saturated Fat: 15g
- Unsaturated Fat: 8g
- Trans Fat: 0g
- Carbohydrates: 30g
- Fiber: 2g
- Protein: 5g
- Cholesterol: 100mg


Leave a Reply